开学了比较忙,没想到一下子拖了这么久,有好多小伙伴评论和 b 站私信评论催我,赶快我抽时间弄了下部署流程,非常抱歉大家,我这项目也比较烂然后也刚好最近事情比较多。
本站使用的是自建的前后端,所以要求是有一台云服务器,预计要求大概是 2c2g,腾讯阿里云 99/r 的轻量应用应该就可以。
这个项目分为,前端,后端,管理面板,推荐模块,其中后端推荐与数据库打包了 docker 镜像,可以快捷进行部署。
我们具体讲解一下部署流程喵
[!NOTE] 看这里看这里看这里🤗
感谢大家的建议,我打算弄一个qq交流群,大家有代码的生活分享的,什么都可以来讨论捏!!!
群号:344321218
本项目部署中遇到的问题大家也可以随时来提出捏!!!
部署教程(快速简单)
管理面板
建议大家如果命令不是很熟悉的话使用 1panel 进行运维管理:1Panel - 现代化、开源的 Linux 服务器运维管理面板 - 官网
我们按照官网教程安装面板就可以,我这里使用的是 Ubuntu24.04,只需运行:
curl -sSL https://resource.fit2cloud.com/1panel/package/quick_start.sh -o quick_start.sh && sudo bash quick_start.sh
安装时候记得配置好镜像加速,记录好他生成的访问地址和用户名密码,在防火墙中放行端口,然后我们在浏览器访问就可以看到面板啦

输入我们之前看到/设置的用户名和密码
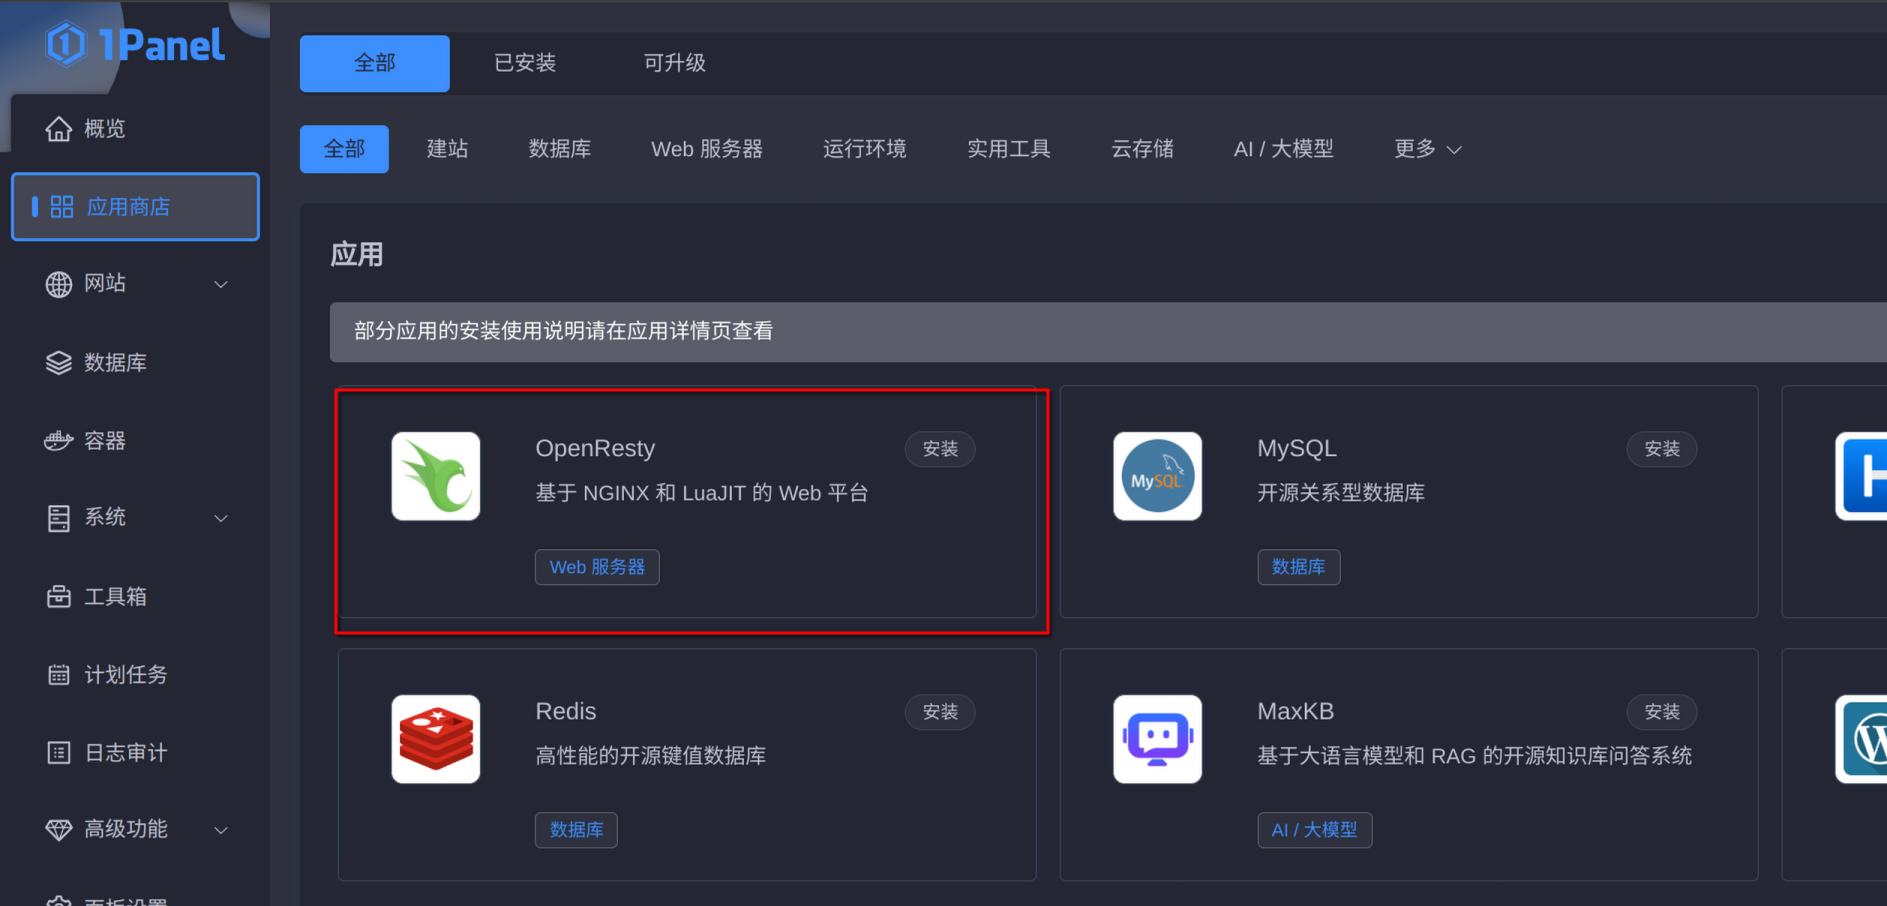
安装服务/反代程序 OpenResty
进入左侧软件商店——安装 OpenResty 即可
[!NOTE] 提示
当然这里用 Nginx 或 OpenResty 都可以哦,如果你发现 80 端口提示被占用没准就是已经有 nginx 了,可以通过
shellsudo lsof -i :80看一下占用的进程是不是 nginx,如果选择用 Nginx 就不用再安装这个了,如果想换成 OpenResty 就把 Nginx 服务关一下捏:
shellsudo systemctl stop nginx sudo systemctl disable nginx
没问题的话配置不用修改直接安装就可以啦
部署容器
首先打开我的仓库的 docker-compose.yml 文件:这里
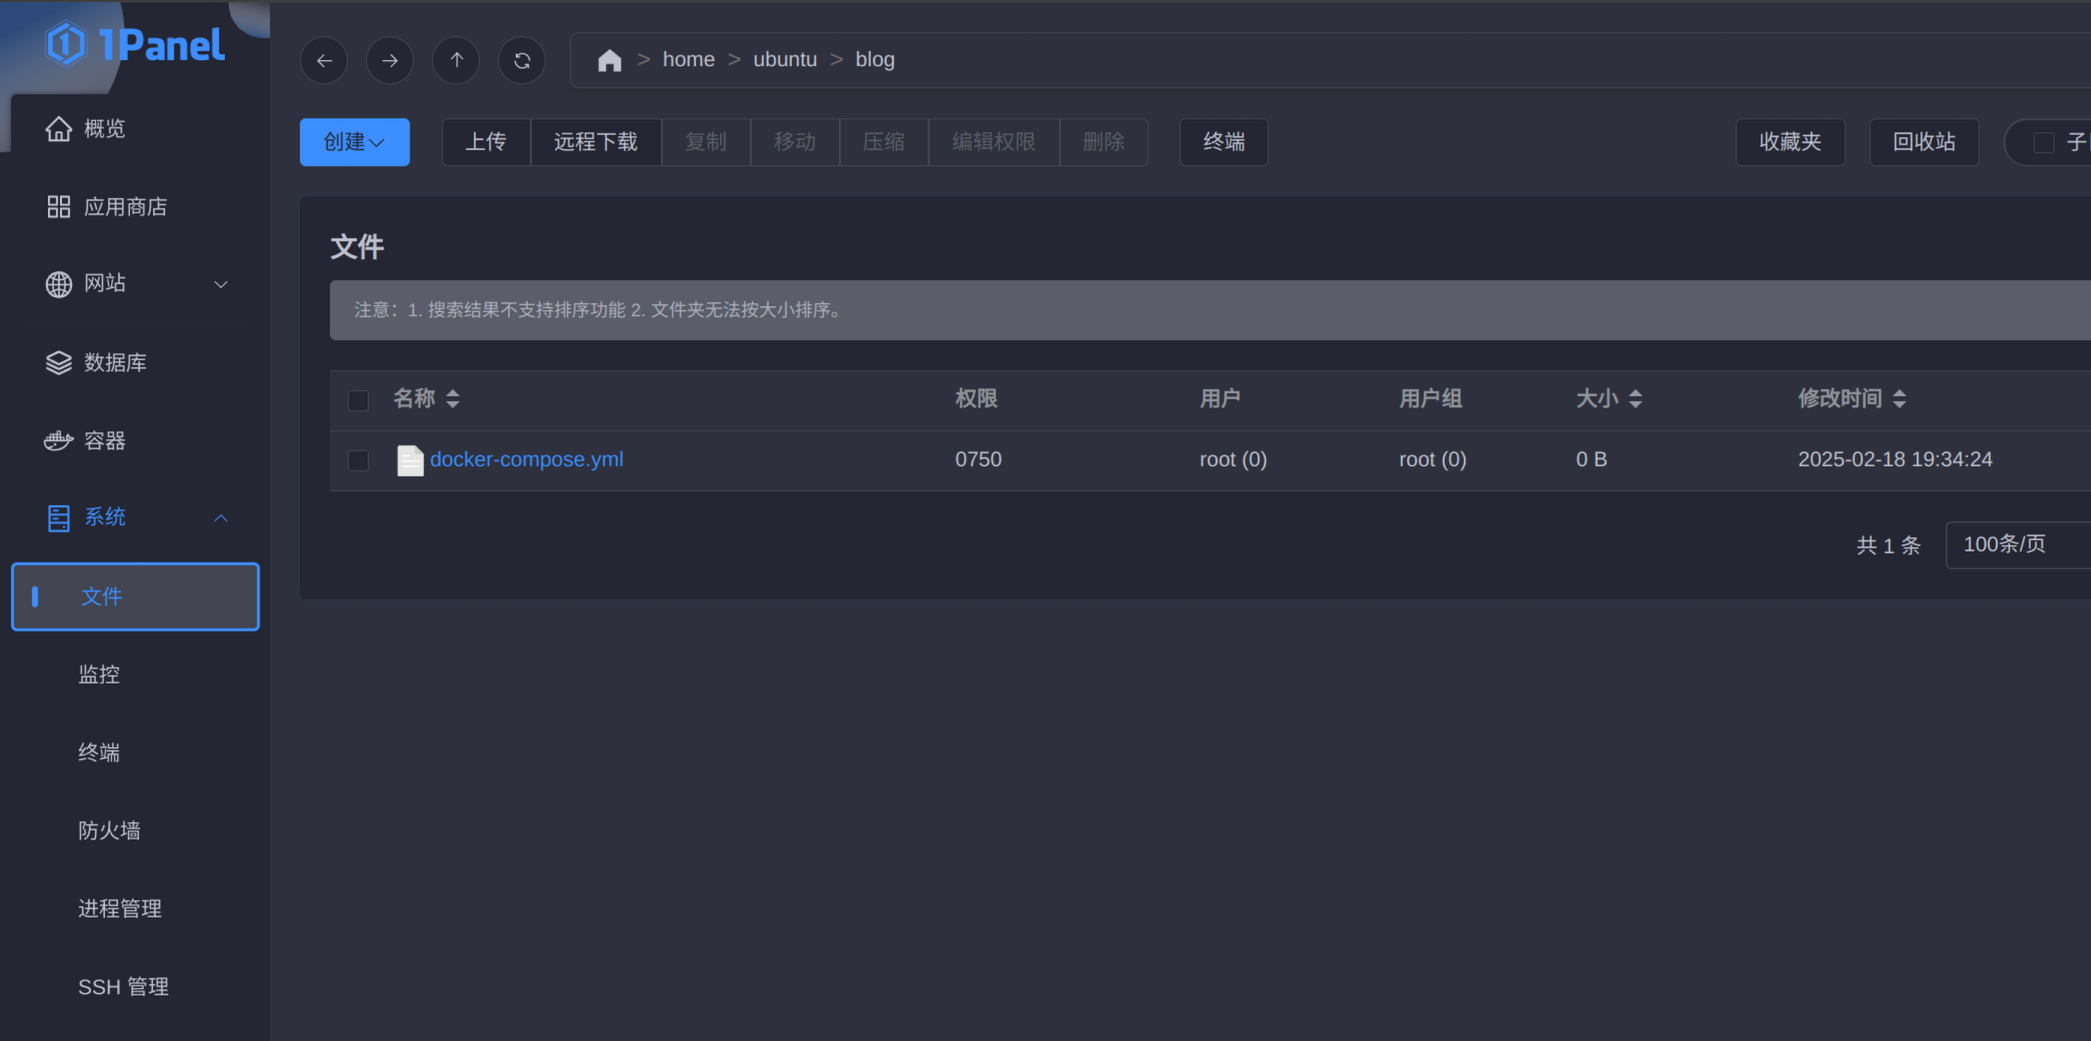
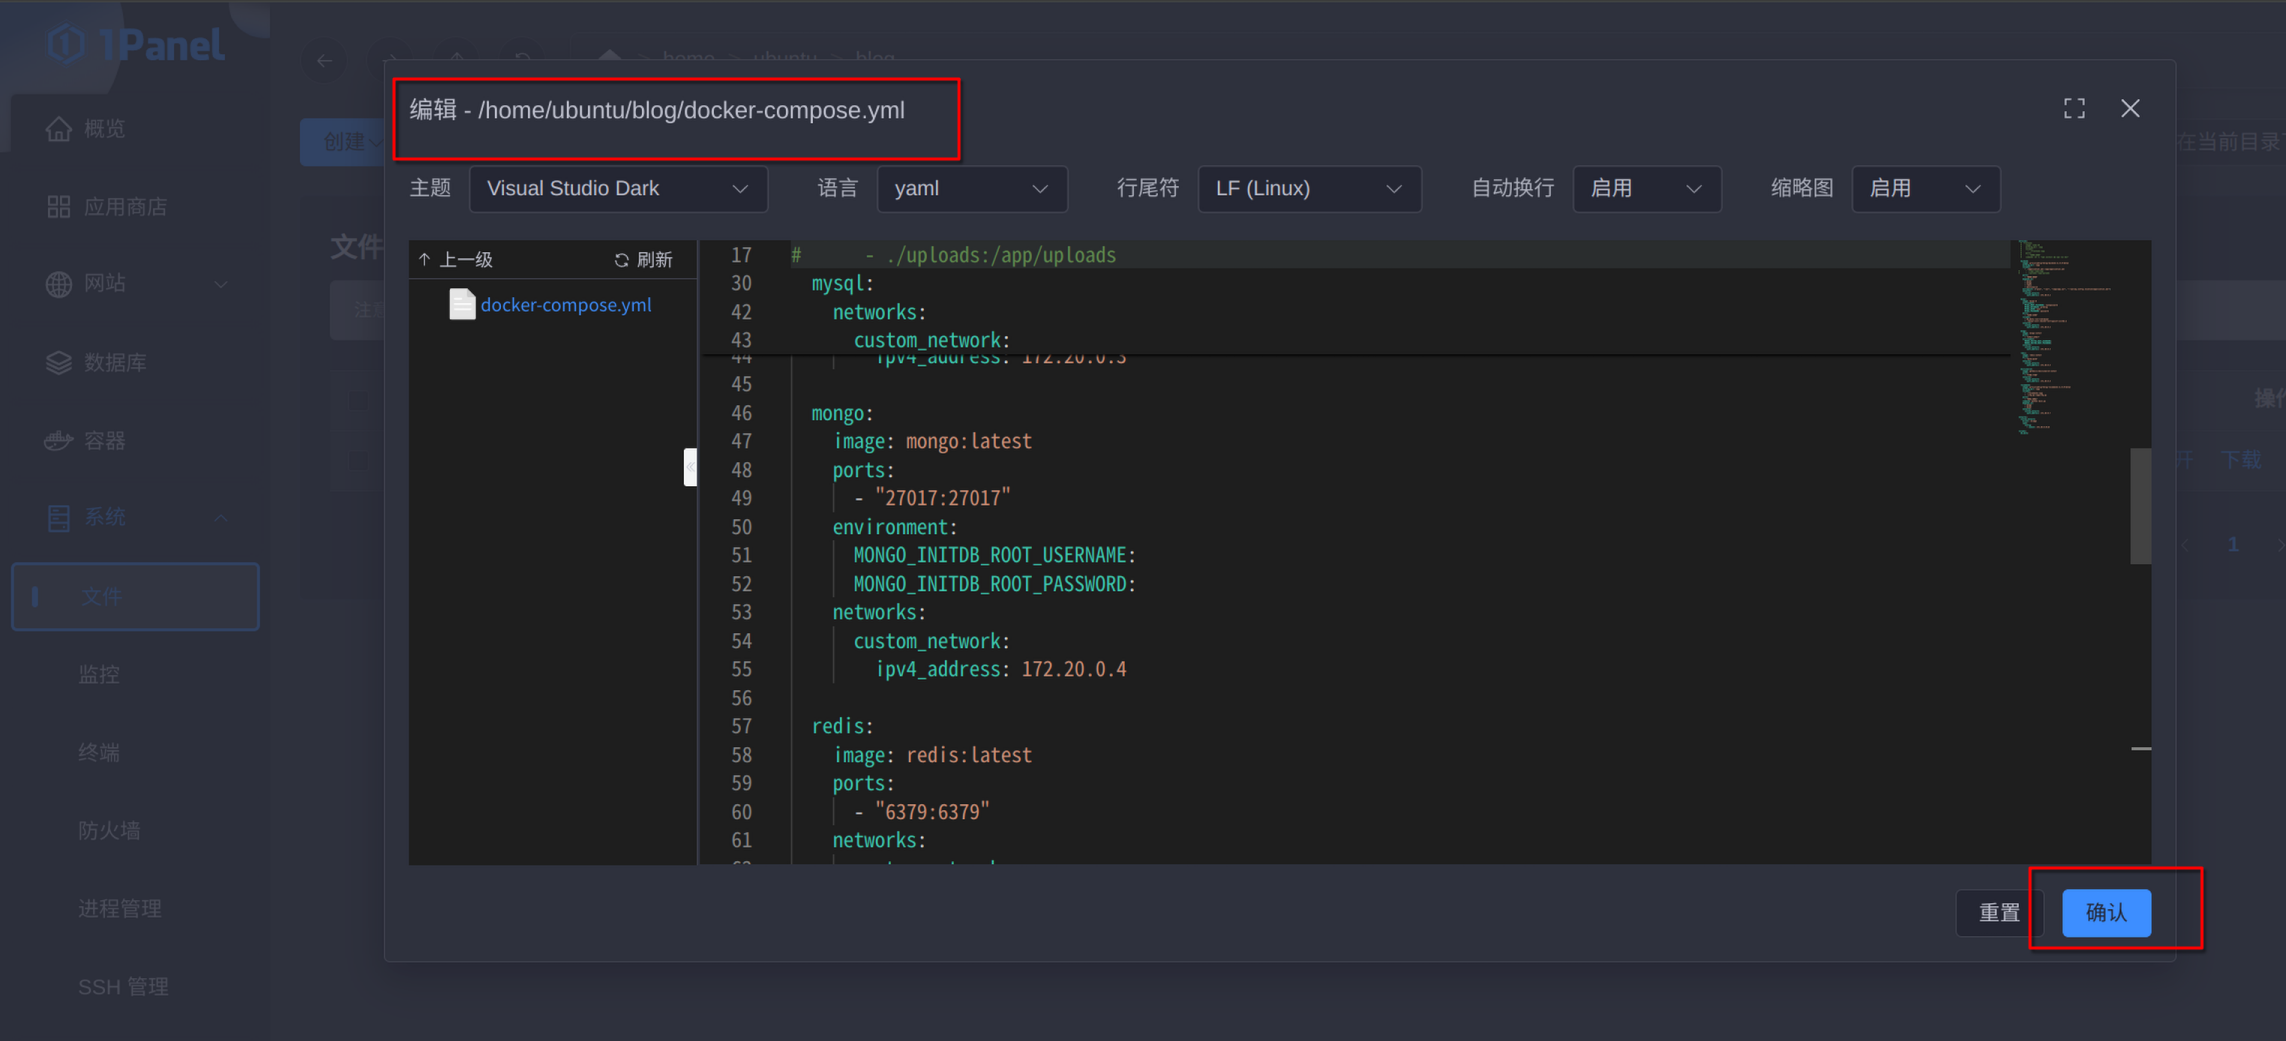
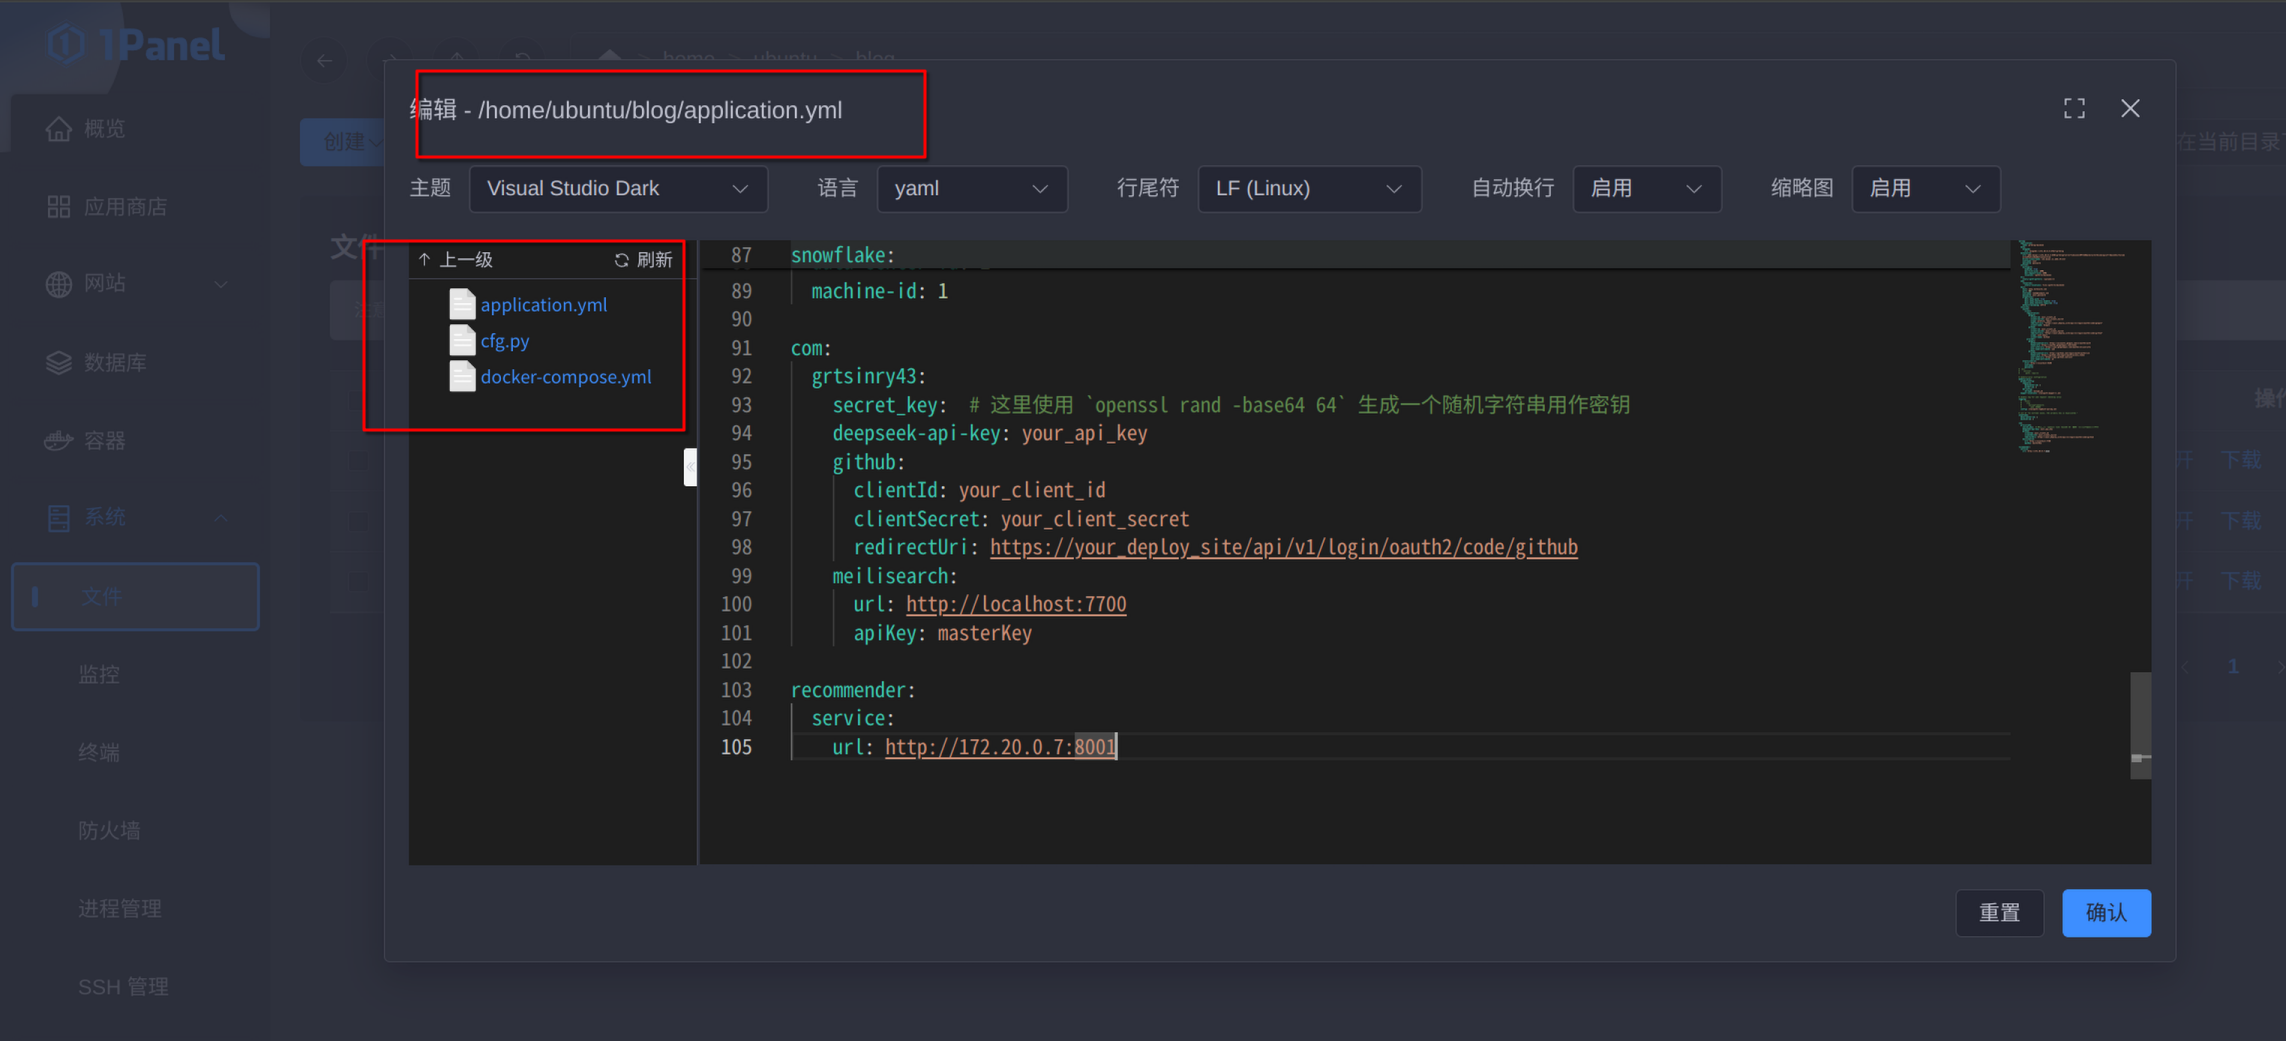
面板中打开系统——文件,在用户的家目录(当然哪里都可以,比如我这里是 /home/ubuntu),新建一个文件夹(比如我这里叫 blog),在里面新建一个 docker-compose.yml,然后复制仓库中文件的内容。
之后我们要填写配置捏,打开仓库中的两个配置文件:application-example.yml cfg.py
然后像刚才一样复制粘贴内容(记得把 application-example.yml 重命名为 application.yml),最后的效果是文件夹中的三个文件。
最后新建 mysql-init 文件夹并复制 init.sql/my.cfg:init.sql my.cnf
[!NOTE] 提示
这里的第一行插入用户,修改为自己的邮箱就好,密码可以在前台通过邮箱重置,默认为 123456,务必保证邮箱准确
[!WARNING]
这里不要忘记最后把
mysql-init文件夹权限改成 0775
修改配置
我们需要修改 application.yml,具体要修改以下内容:
spring:
  application:
    name: grtblog-backend
  data:
    mongodb:
      uri: mongodb://172.20.0.4:27017/grtblog
  datasource:
    url: jdbc:mysql://172.20.0.3:3306/grtblog?serverTimezone=GMT%2B8&characterEncoding=utf-8&useSSL=false&allowPublicKeyRetrieval=true
    driver-class-name: com.mysql.cj.jdbc.Driver
    username: user
    password: password
  servlet:
    multipart:
      enabled: true
      max-file-size: 10MB
      max-request-size: 10MB
      location: /path/to/backend/  # 这里改成刚才blog文件夹的路径,例如/home/ubuntu/blog/
  mvc:
    static-path-pattern: /uploads/**
  web:
    resources:
      static-locations: file:/path/to/backend/y # 这里改成刚才blog文件夹的路径,例如/home/ubuntu/blog/
  mail:
    host: smtp.larksuite.com
    port: 587
    username: [email protected] # 这里参考我之前文章的申请飞书邮箱来获取
    password: your_password
    properties:
      mail.smtp.auth: true
      mail.smtp.starttls.enable: true
      mail.smtp.starttls.required: true
    default-encoding: UTF-8
  security:
    oauth2:
      client:
        registration:
          google:
            client-id: your_client_id #这里是在对应的开发者平台获取OAuth登录方式,拿到clientID和secret
            client-secret: your_client_secret
            scope: profile, email
            redirect-uri: "https://your_deploy_site/api/v1/login/oauth2/code/google"
            client-name: Google
          github:
            client-id: your_client_id
            client-secret: your_client_secret
            redirect-uri: "https://your_deploy_site/api/v1/login/oauth2/code/github"
            scope: user:email
            client-name: Github
        provider:
          google:
            authorization-uri: https://accounts.google.com/o/oauth2/auth
            token-uri: https://oauth2.googleapis.com/token
            user-info-uri: https://www.googleapis.com/oauth2/v3/userinfo
            user-name-attribute: sub
          github:
            authorization-uri: https://github.com/login/oauth/authorize
            token-uri: https://github.com/login/oauth/access_token
            user-info-uri: https://api.github.com/user
            user-name-attribute: id
    elasticsearch:
      uris: http://localhost:9200
      username:
      password:
mybatis-plus:
  global-config:
    sequence:
      datacenter-id: 1
      worker-id: 1
    db-config:
      id-type: assign_id
  mapper-locations: classpath:mapper/*.xml

logging:
  config: classpath:logback-spring.xml

snowflake:
  data-center-id: 1
  machine-id: 1

com:
  grtsinry43:
    secret_key:  # 这里使用 `openssl rand -base64 64` 生成一个随机字符串用作密钥
    deepseek-api-key: your_api_key # 这里改成deekseek的开发者密钥
    github:
      clientId: your_client_id # 这里三项不用修改,之后会移除,这个版本先保留
      clientSecret: your_client_secret
      redirectUri: https://your_deploy_site/api/v1/login/oauth2/code/github
    meilisearch:
      url: http://localhost:7700
      apiKey: masterKey # 这里如果你手动设置了meilisearch就改一下key

recommender:
  service:
    url: http://172.20.0.7:8001
启动容器
选择容器——编排——创建编排,选择刚才的 docker-compose.yml
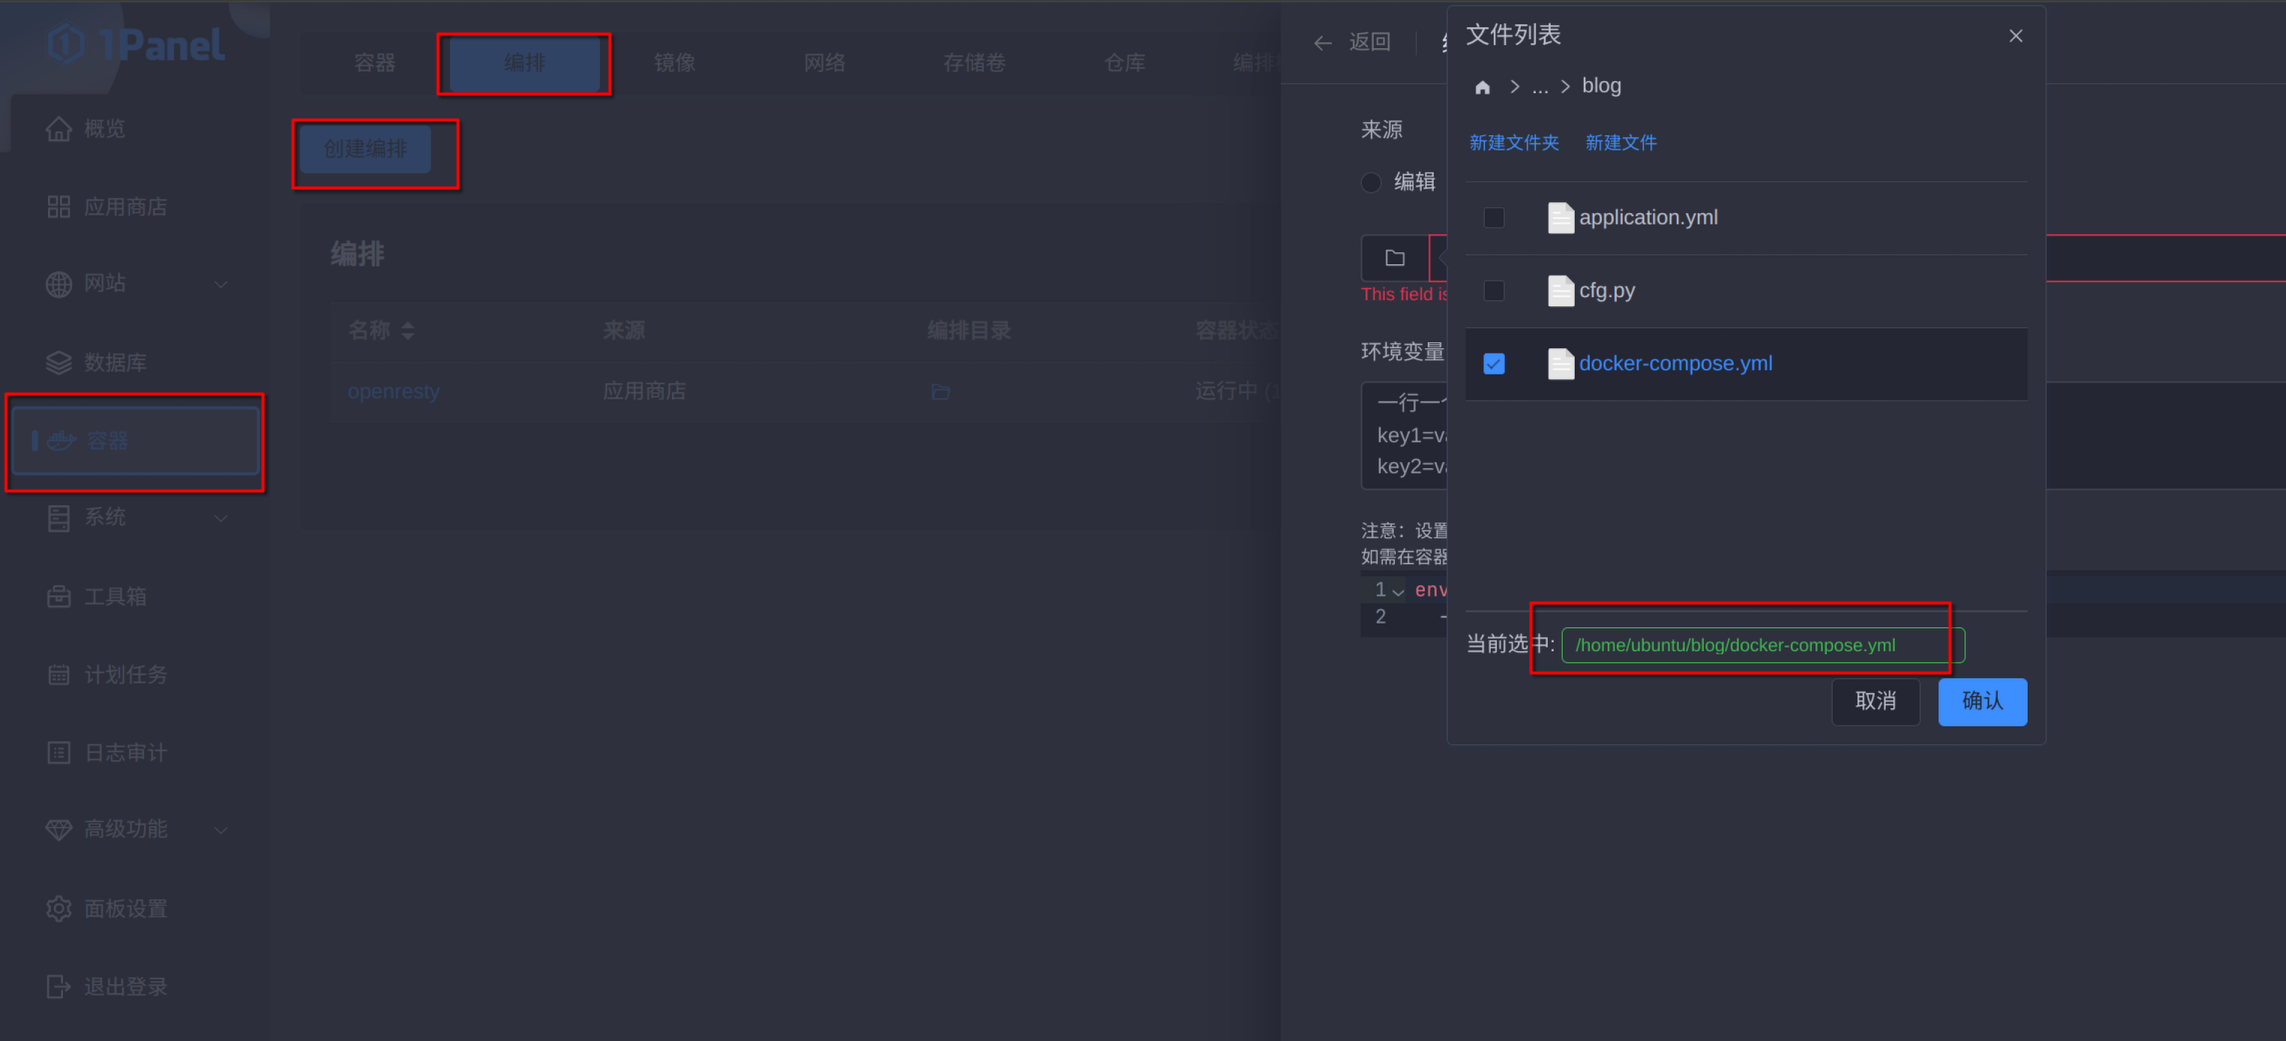
静静等待拉取捏…
[!NOTE] 提示
由于容器启动的速度不可预测,有可能存在依赖容器晚于需求容器,如果有报错退出的情况,直接重启容器就好
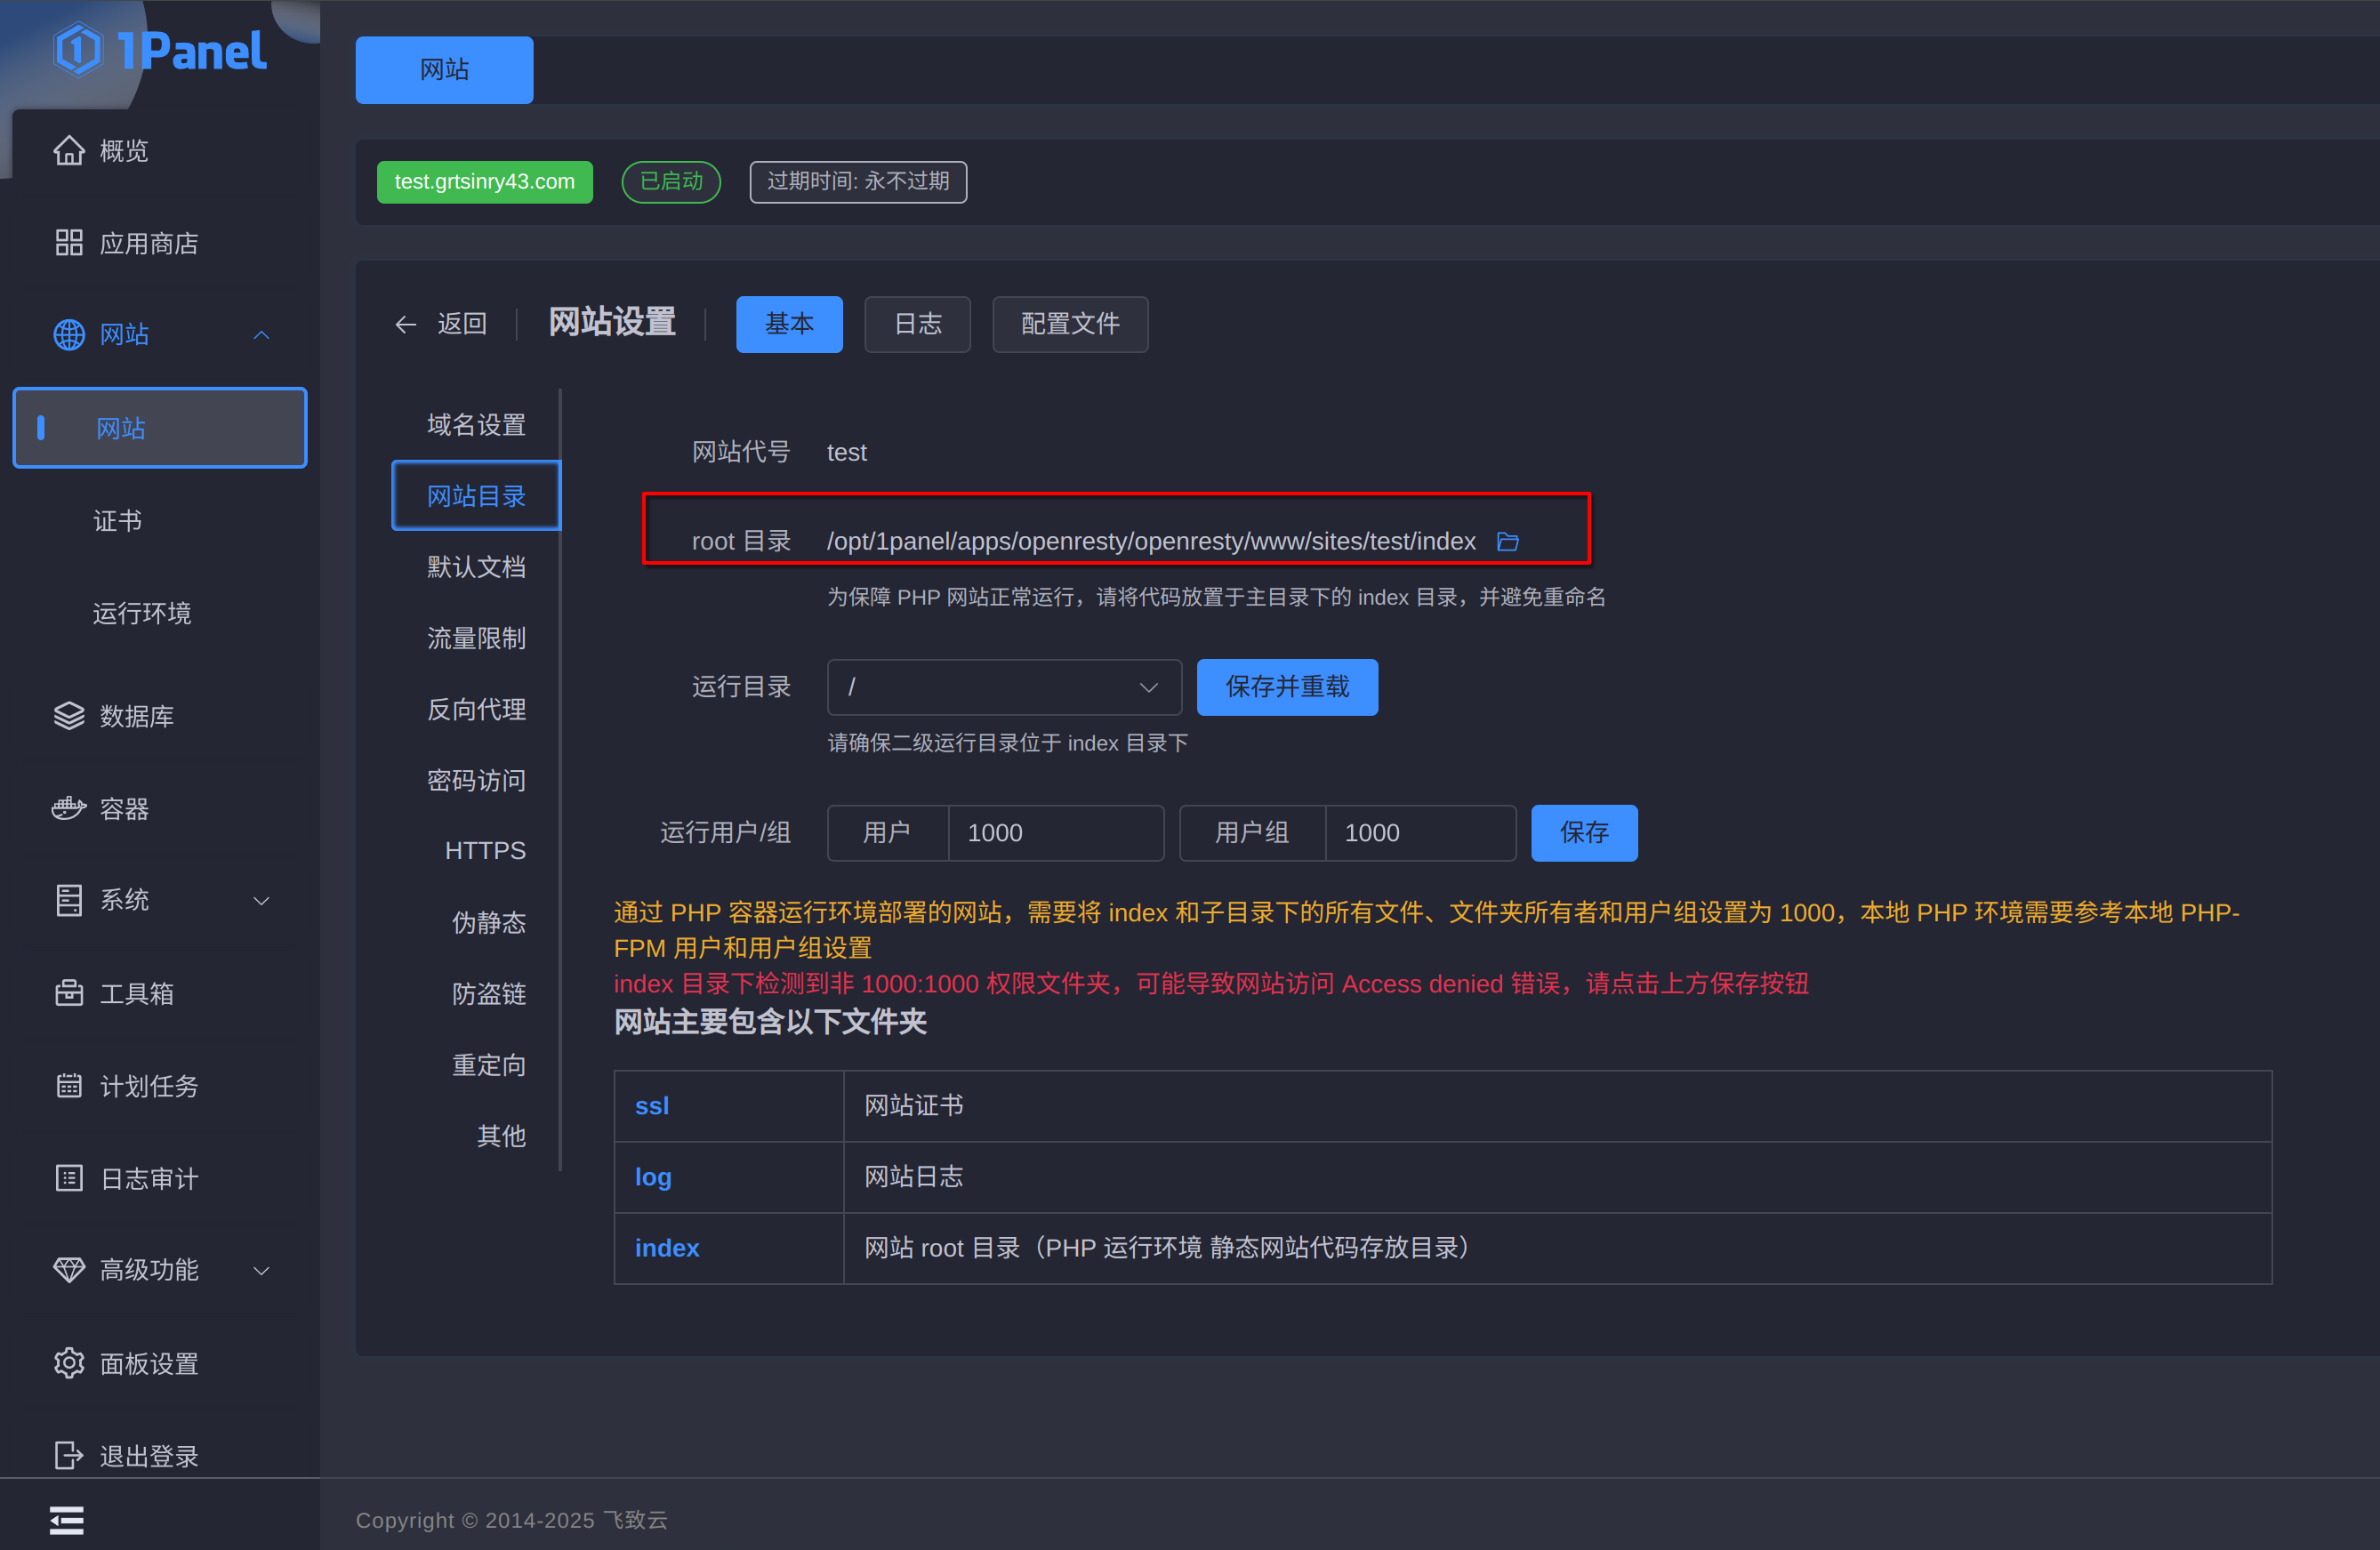
配置反向代理
首先创建一个网站服务,然后配置——配置文件,复制以下并修改即可:
server {
    listen 443 ssl http2 ;
    listen 80 ;
    # SSL configuration
    #
    #
    # Note: You should disable gzip for SSL traffic.
    # See: https://bugs.debian.org/773332
    #
    # Read up on ssl_ciphers to ensure a secure configuration.
    # See: https://bugs.debian.org/765782
    #
    # Self signed certs generated by the ssl-cert package
    # Don't use them in a production server!
    #
    # include snippets/snakeoil.conf;
    server_name test.grtsinry43.com; # 改成你自己的域名
    client_max_body_size 10m;
    # URL结构修改,SEO平稳过渡
    # 添加重定向规则
    #location ~ ^/(\d{4})/(\d{2})/(\d{2})/(.*)$ {
    #return 301 /posts/$4;
    #    }
    location /admin {
        alias /www/sites/test/index;  # 这里的test是之前的“代号”
        try_files $uri $uri/ /admin/index.html;
        autoindex on;
    }
    location / {
        proxy_pass http://127.0.0.1:3000; # 后端地址
        proxy_set_header Host $http_host;
        proxy_set_header X-Real-IP $remote_addr;
        proxy_set_header X-Forwarded-For $proxy_add_x_forwarded_for;
        proxy_set_header X-Forwarded-Proto $scheme;
    }
    location /api/v1 {
        rewrite ^/api/v1/(.*)$ /$1 break;
        proxy_pass http://127.0.0.1:8080;
        client_max_body_size 256m;
        proxy_set_header Host $http_host;
        proxy_set_header X-Real-IP $remote_addr;
        proxy_set_header X-Forwarded-For $proxy_add_x_forwarded_for;
        proxy_set_header X-Forwarded-Proto $scheme;
    }
    location /api/v1/summary {
        rewrite ^/api/v1/(.*)$ /$1 break;
        proxy_pass http://127.0.0.1:8080/summary;
        proxy_set_header Host $http_host;
        proxy_set_header X-Real-IP $remote_addr;
        proxy_set_header X-Forwarded-For $proxy_add_x_forwarded_for;
        proxy_set_header Connection '';
        proxy_http_version 1.1; # 重要:确保使用HTTP/1.1协议
        proxy_set_header Upgrade $http_upgrade;
        proxy_set_header Connection 'upgrade';
        # 添加以下配置以处理SSE
        proxy_buffering off;
        proxy_cache off;
    }
    location /socket.io {
        proxy_pass http://127.0.0.1:9091/socket.io;
        proxy_set_header Host $host;
        proxy_set_header X-Real-IP $remote_addr;
        proxy_set_header X-Forwarded-For $proxy_add_x_forwarded_for;
        proxy_set_header REMOTE-HOST $remote_addr;
        proxy_set_header Upgrade $http_upgrade;
        proxy_set_header Connection "upgrade";
        proxy_buffering off;
        proxy_http_version 1.1;
        add_header Cache-Control no-cache;
        proxy_set_header X-Forwarded-Proto $scheme;
        proxy_read_timeout 60s;
        proxy_send_timeout 60s;
    }
    location /uploads {
        proxy_pass http://127.0.0.1:8080;
        proxy_set_header Host $http_host;
        proxy_set_header X-Real-IP $remote_addr;
        proxy_set_header X-Forwarded-For $proxy_add_x_forwarded_for;
        proxy_set_header X-Forwarded-Proto $scheme;
    }
    location /captcha {
        proxy_pass http://127.0.0.1:8080;
        proxy_set_header Host $http_host;
        proxy_set_header X-Real-IP $remote_addr;
        proxy_set_header X-Forwarded-For $proxy_add_x_forwarded_for;
        proxy_set_header X-Forwarded-Proto $scheme;
    }
}
之后申请证书并开启 https 就好
配置管理面板
进入 Release 下载最新版即可,然后解压并上传,上传的路径就是你的网站目录
完成之后,你可以预先在 https://example.com/admin/config 修改你的网站信息,这样可以快速看到效果
构建前端
克隆这个项目,进入 frontend 目录
pnpm install
然后,编辑 .env.production,改成你的域名,下方 Clarity 没有就留空。
编辑 frontend/src/app/layout.tsx,将 openpanel 修改为你的配置,没有则留空
编辑 frontend/src/app/home/AuthorCard.tsx,里面的卡片信息可以自己修改
(不知道怎么修改?打开我的网站,看哪里想改成什么直接替换文字就行哦)
编辑 frontend/next-sitemap.config.js,改成你自己的域名
编辑 next.config.mjs,里面的图像域名加上你的 cdn 和本站域名
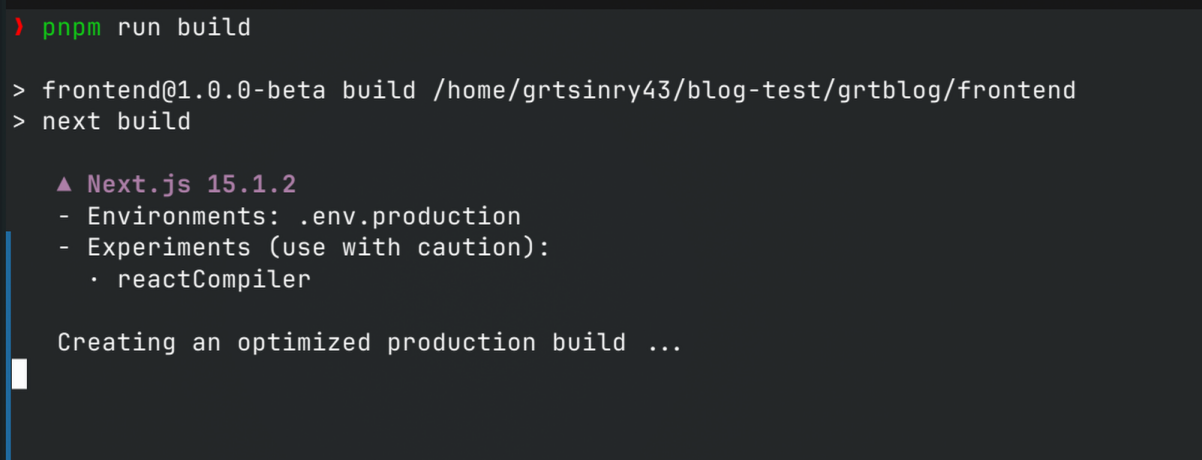
之后构建即可
pnpm run build
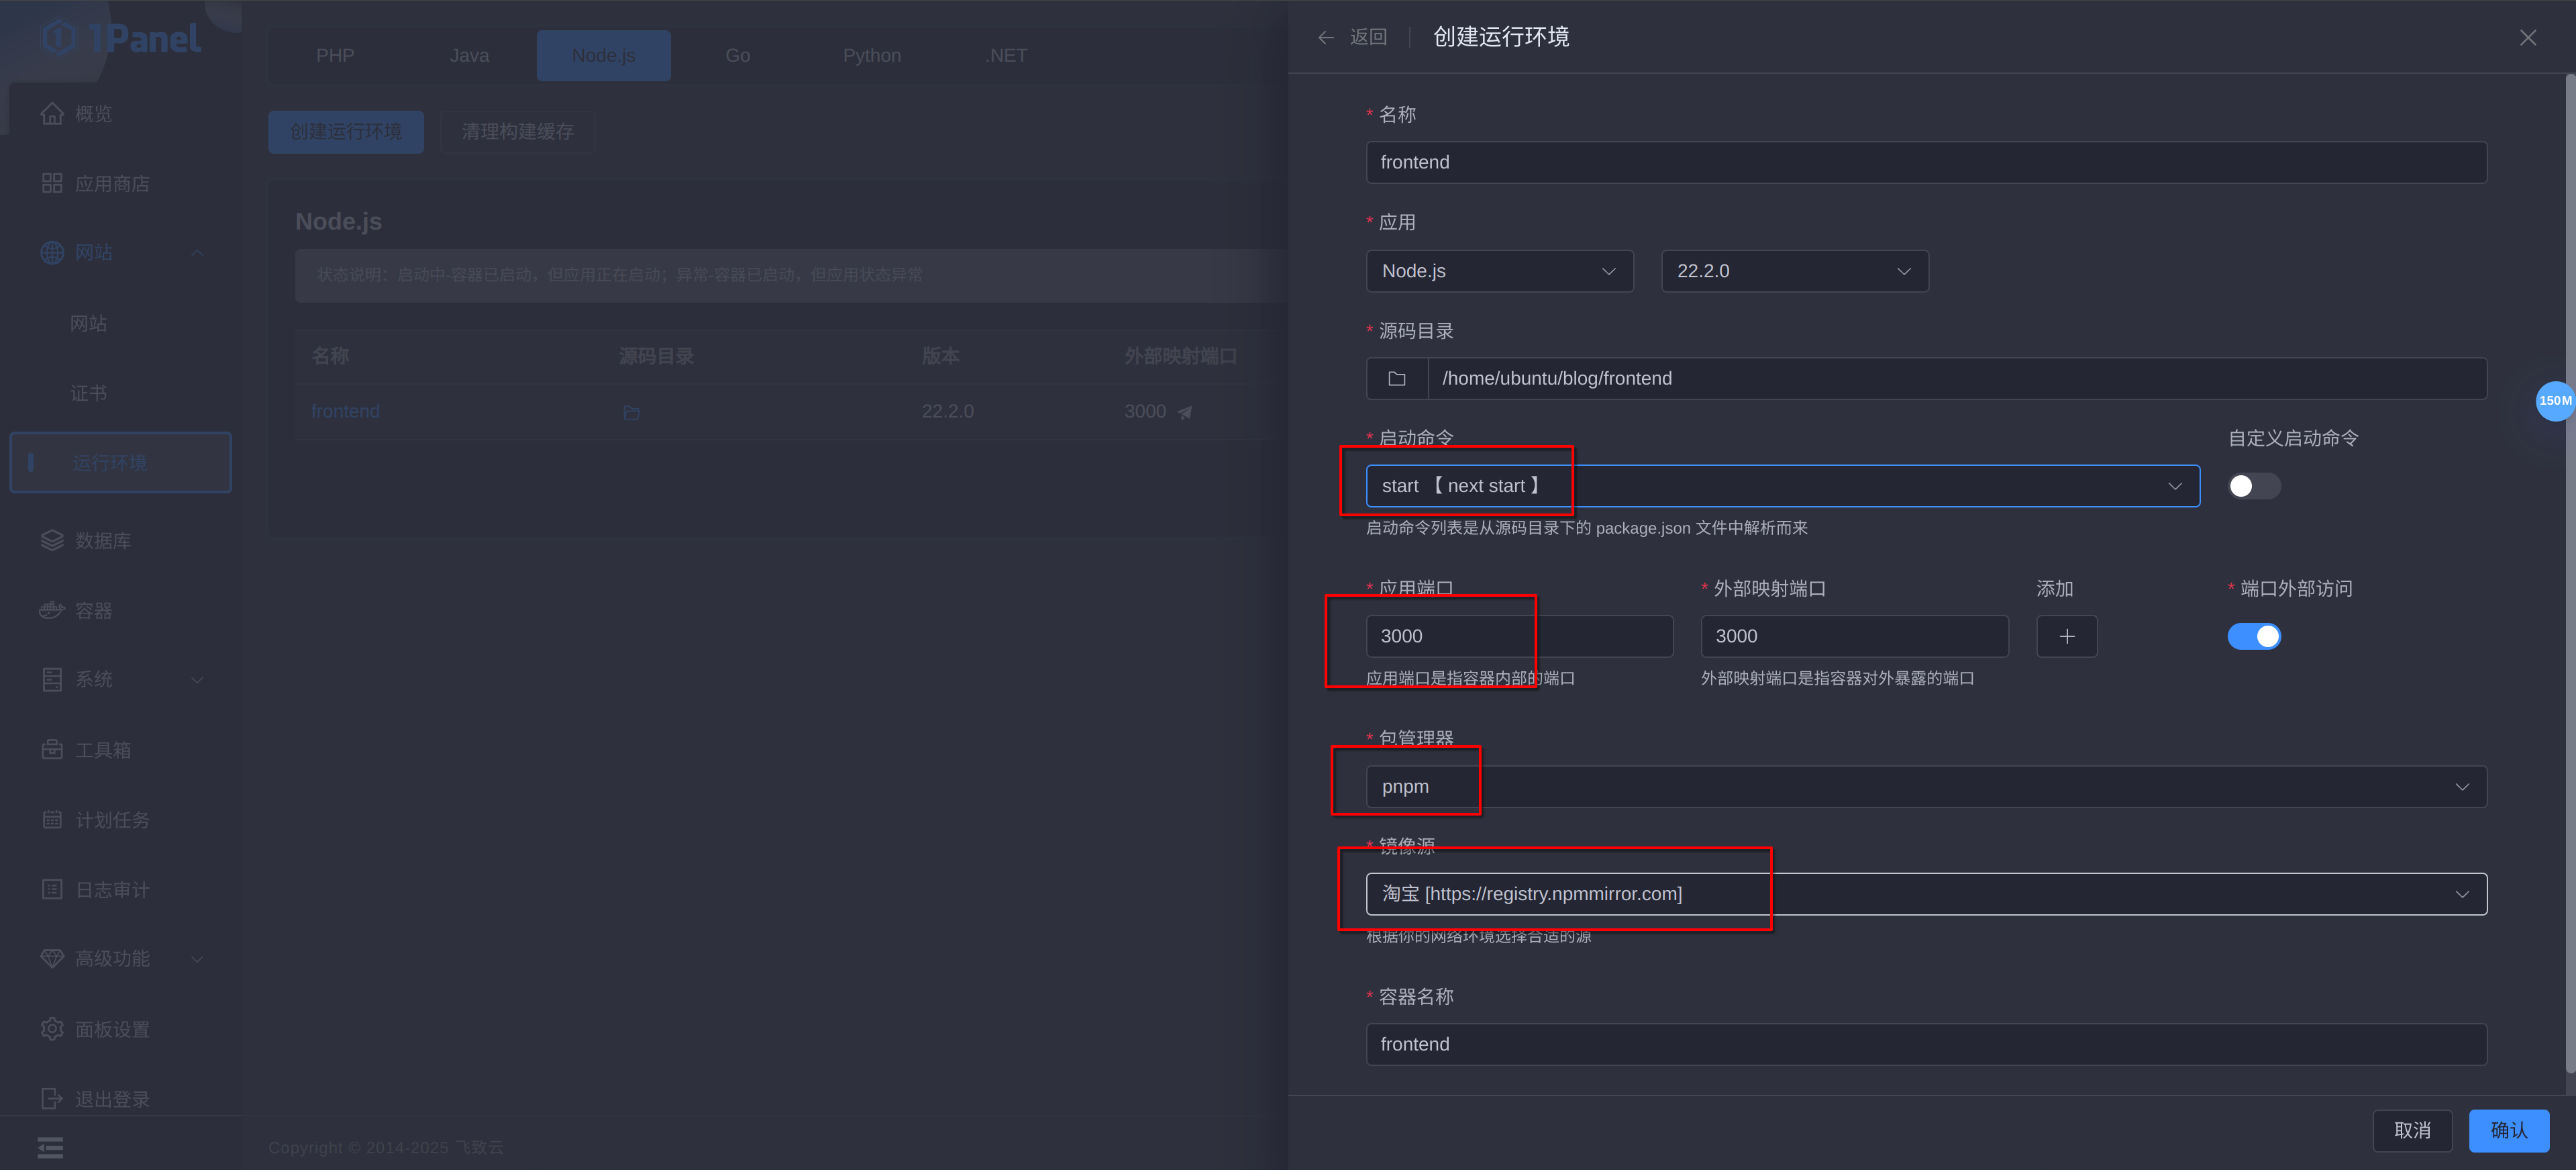
完成构建之后,将产物打包上传并解压到适合目录,比如我这里 ~/blog/frontend,按图配置即可
完整步骤
完整步骤参考文档即可:文档