偶然逛 Vercel 遇到的,本来我是有计划搞一个类似的文档的,并且计划随便搭个 Wikijs,或者 Vitepress/Docusaurus 推一个静态,但是一直懒了就鸽置了。但是感觉这个项目很简洁很舒服,并且自己随便改改代码就可以扩展 MDX,而且它还符合我的审美,用一下记录一下。
这篇文章面向没有前端基础的朋友,跟着我的文章能快速上手,搞一个这样的网站主来
当然,我的网站最终效果也放在这里:Grtsinry43’s Learning Notes
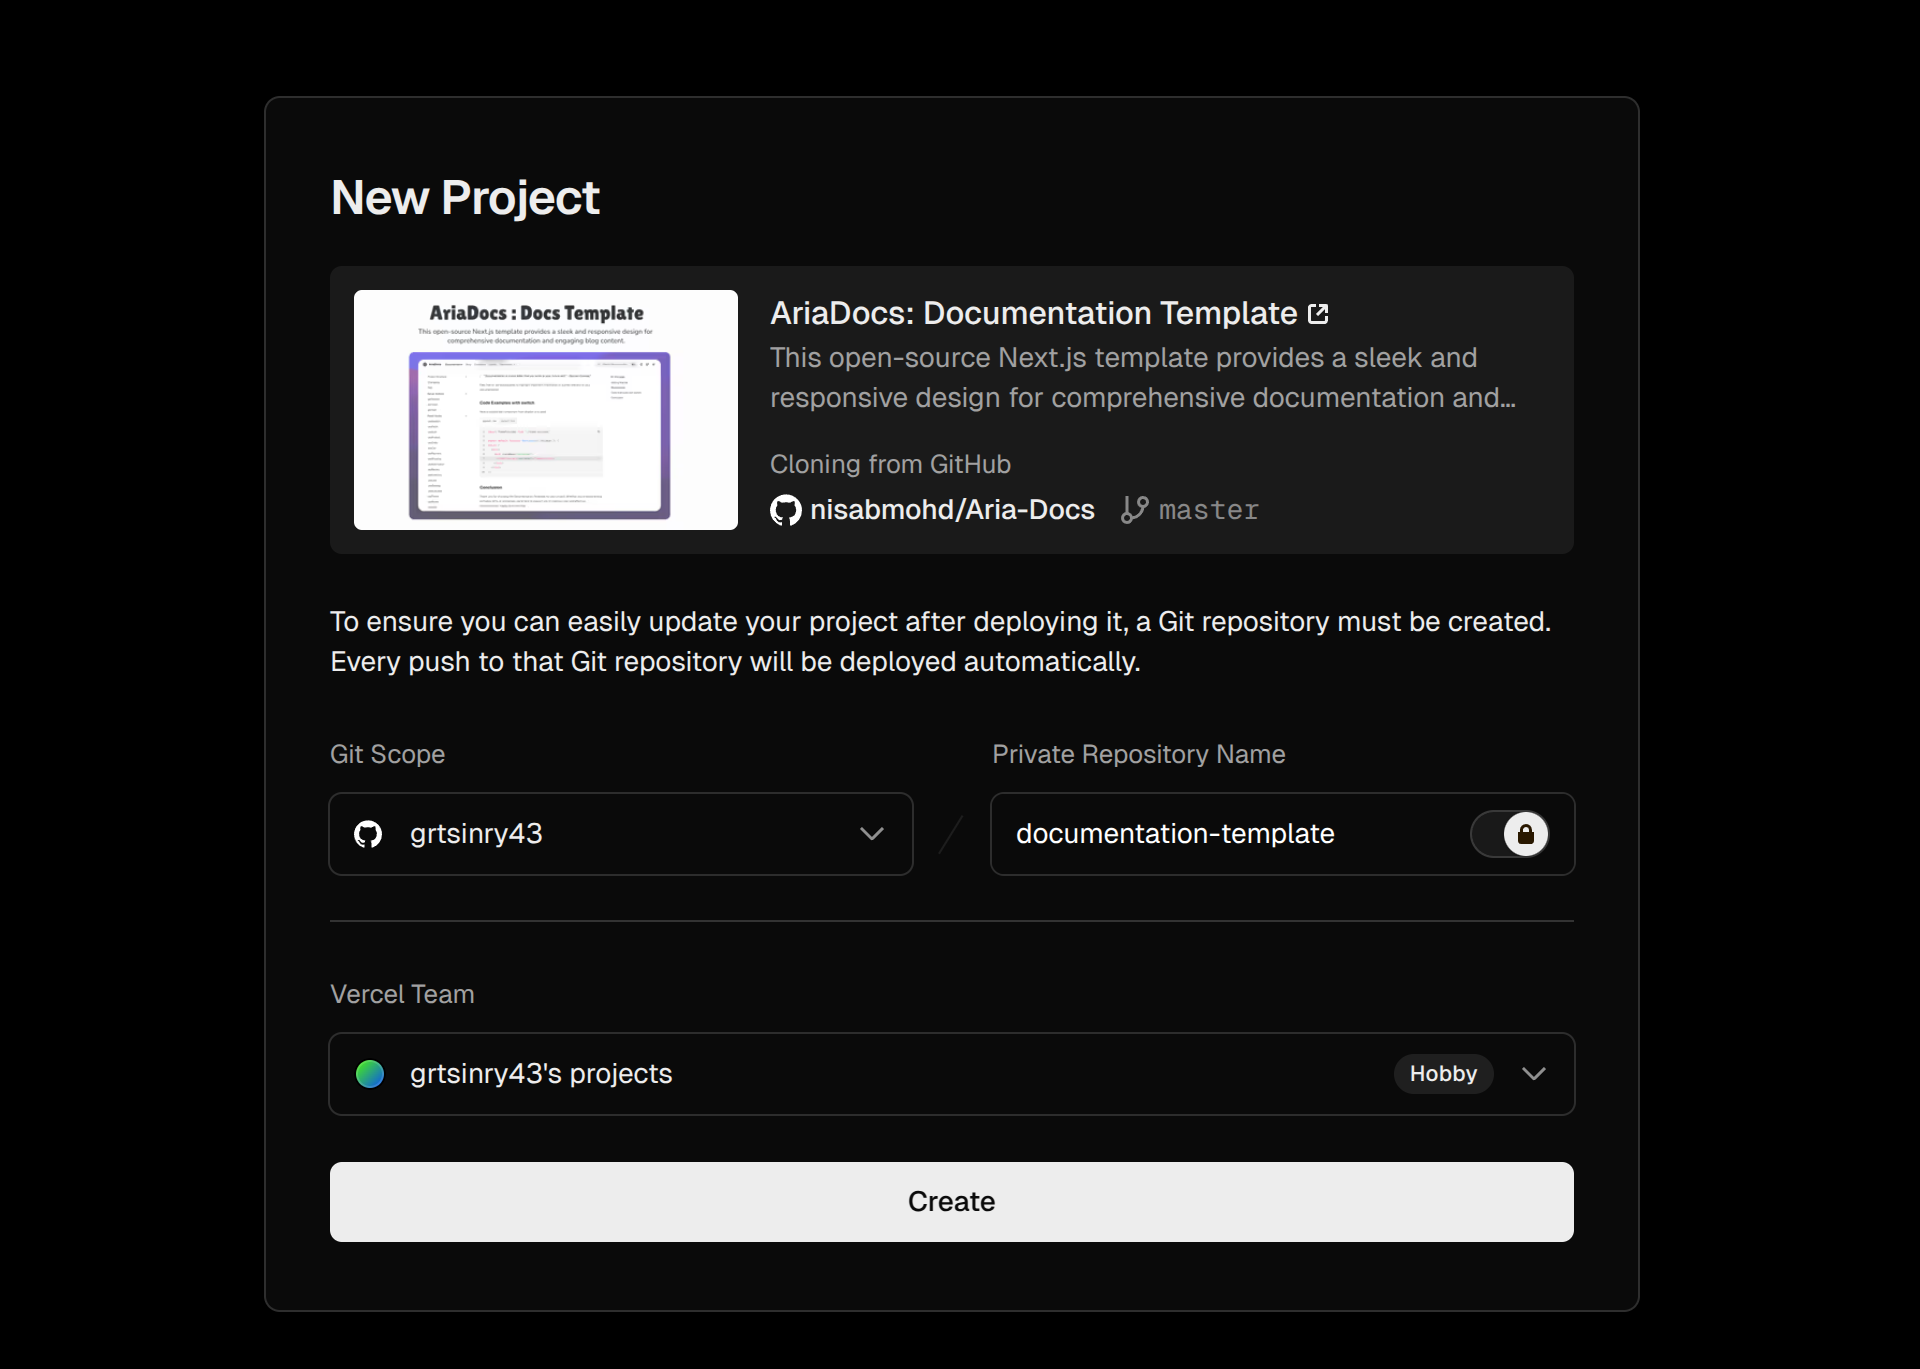
创建仓库和部署
它的快速部署链接在这里:AriaDocs
这里只需点击“Deploy”,然后授权你的 Github 帐号并创建一个仓库就好
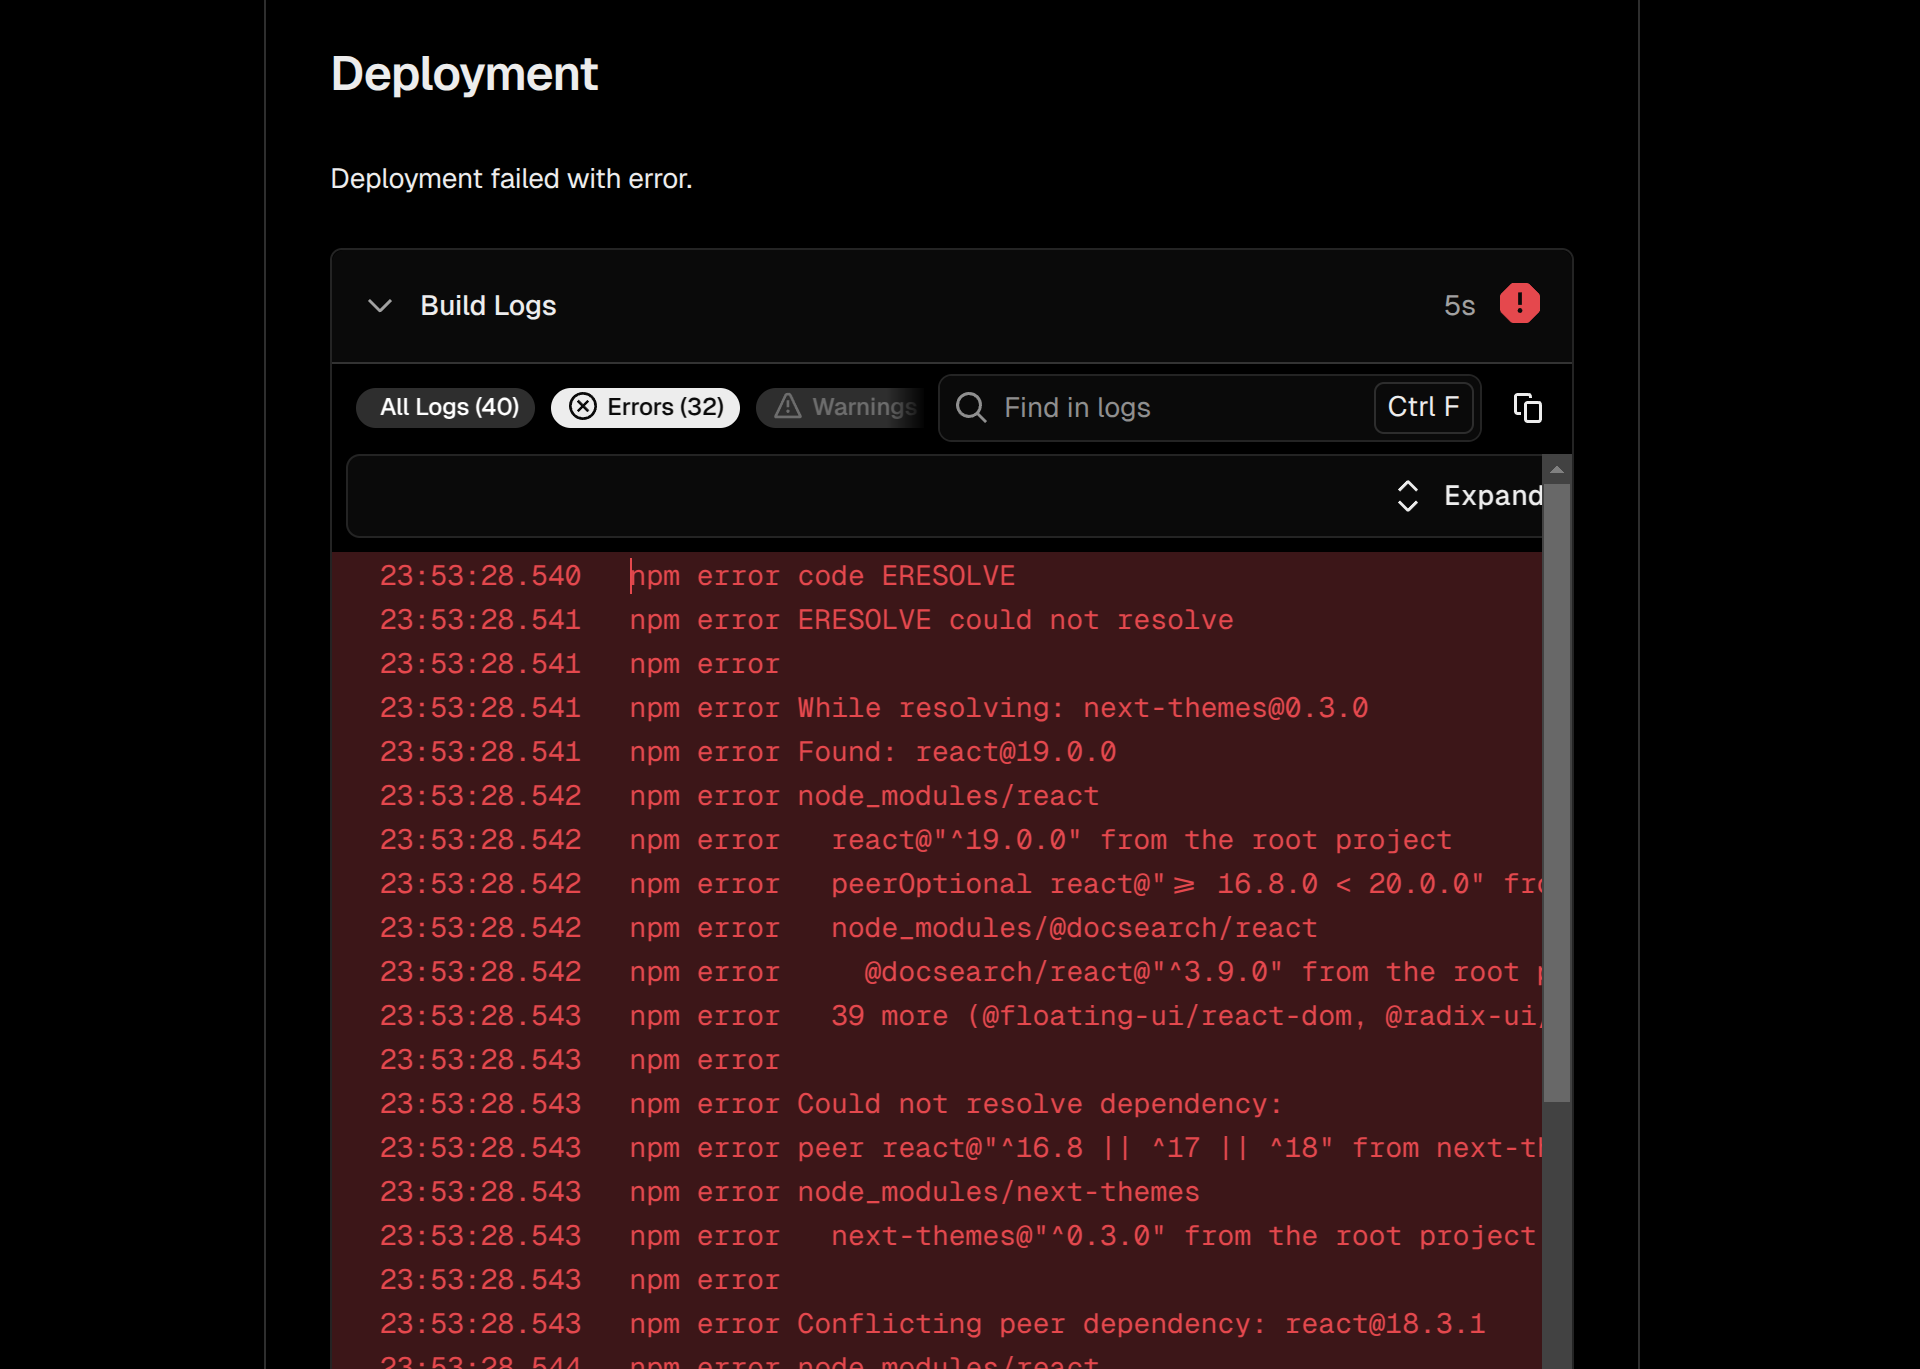
[!NOTE] 提示
这里不出意外的话,就要出意外了,截止本文写下的 2025 年 3 月 1 日,这里 vercel 的部署脚本还是没有修复 React19 带来的依赖问题:
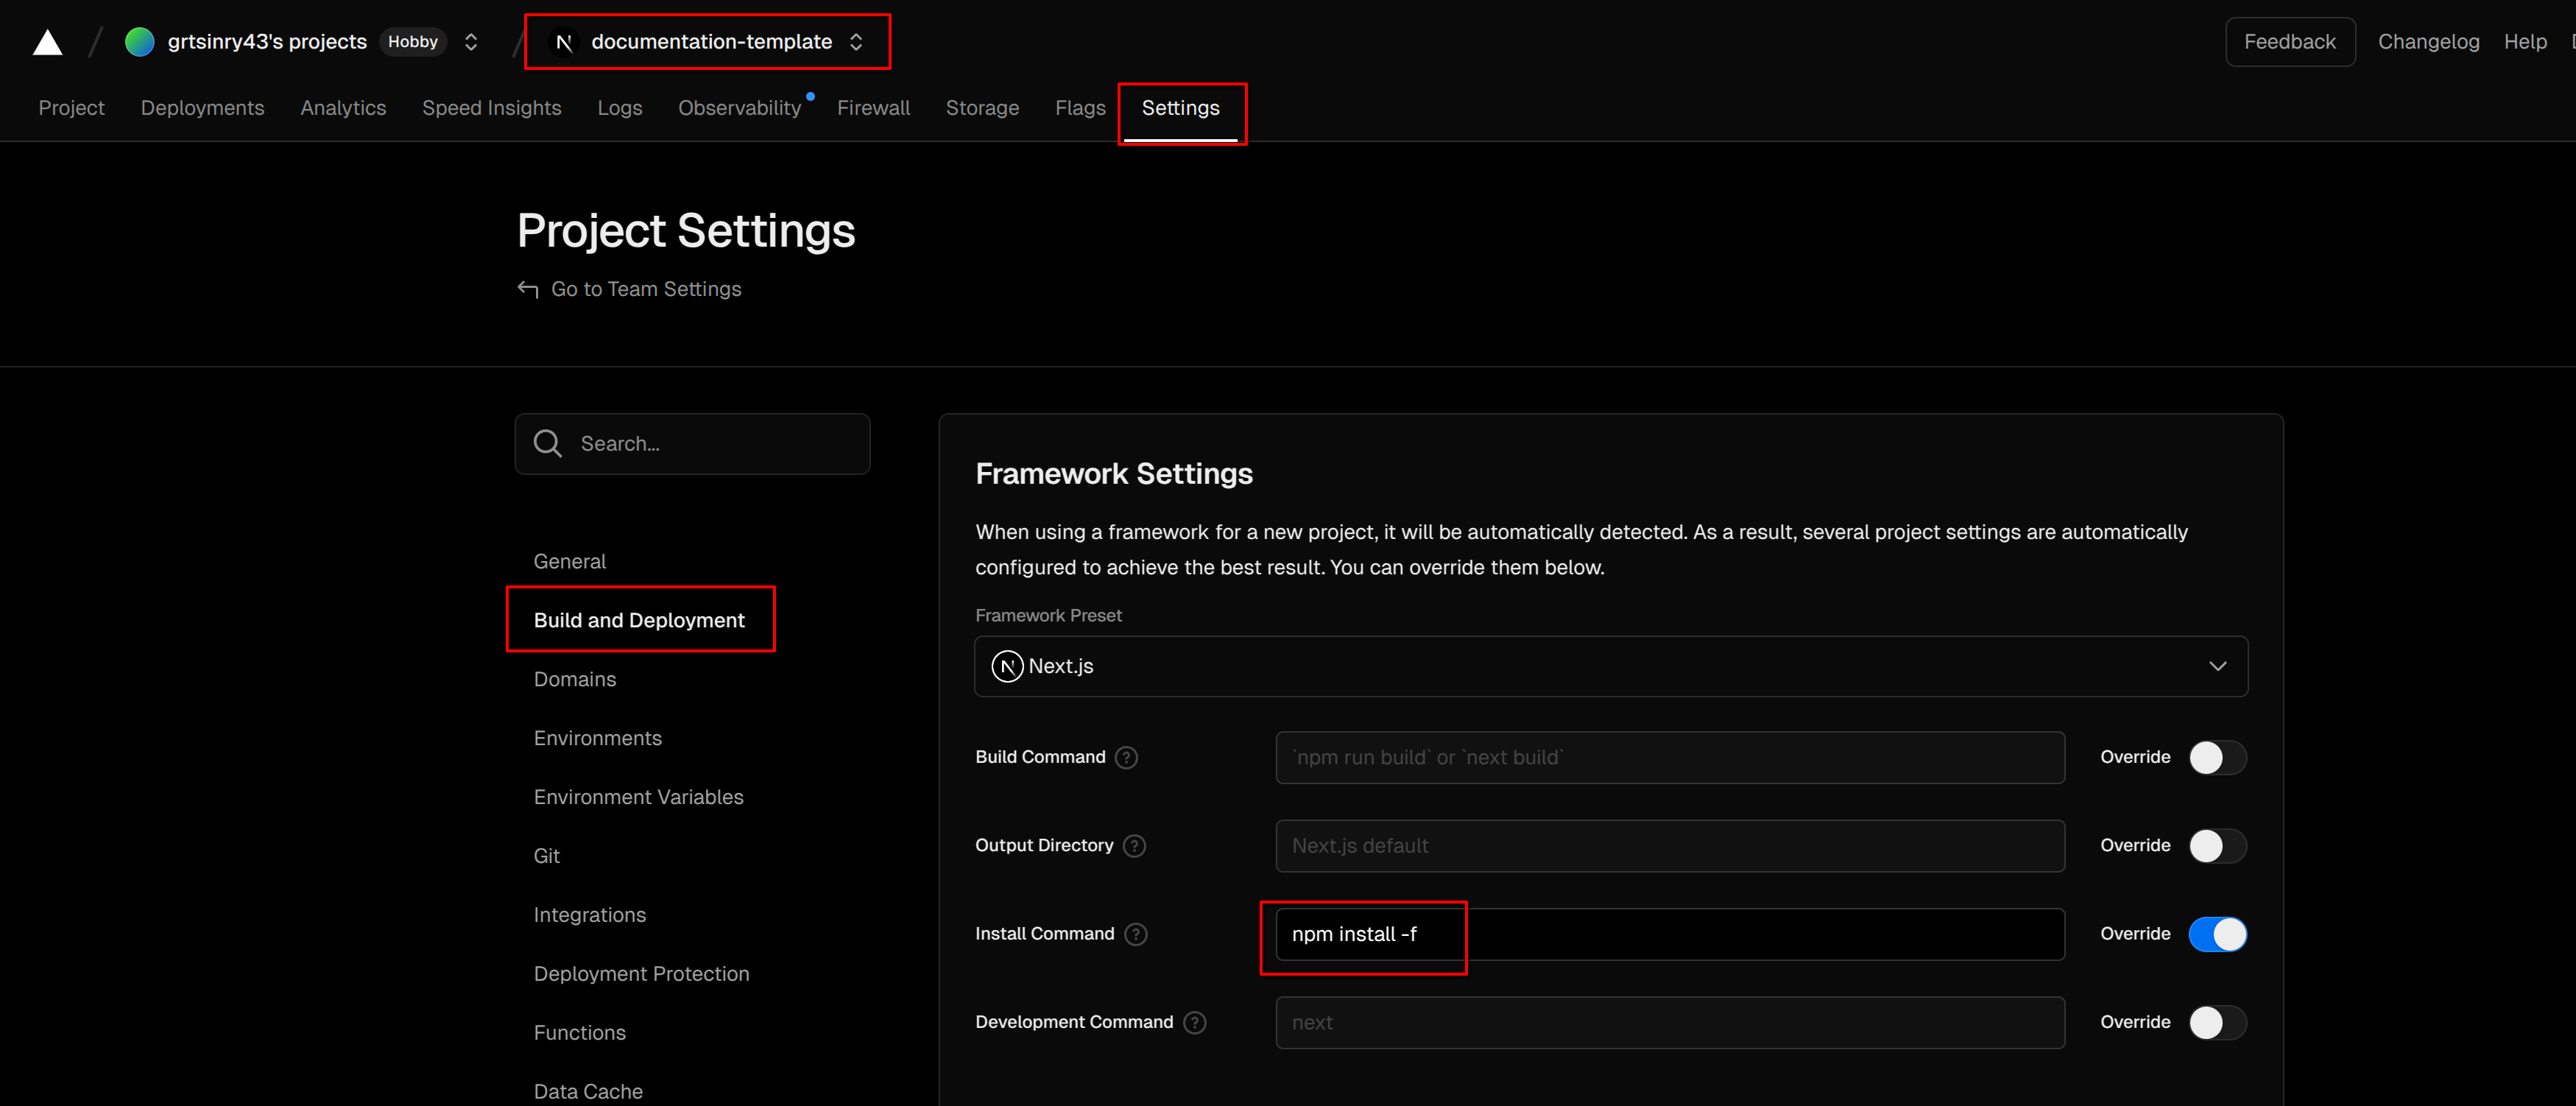
解决部署问题
回到你的 Vercel 首页,找到你刚才的项目-> 设置选项卡-> Build and Deployment-> 将安装命令修改并保存
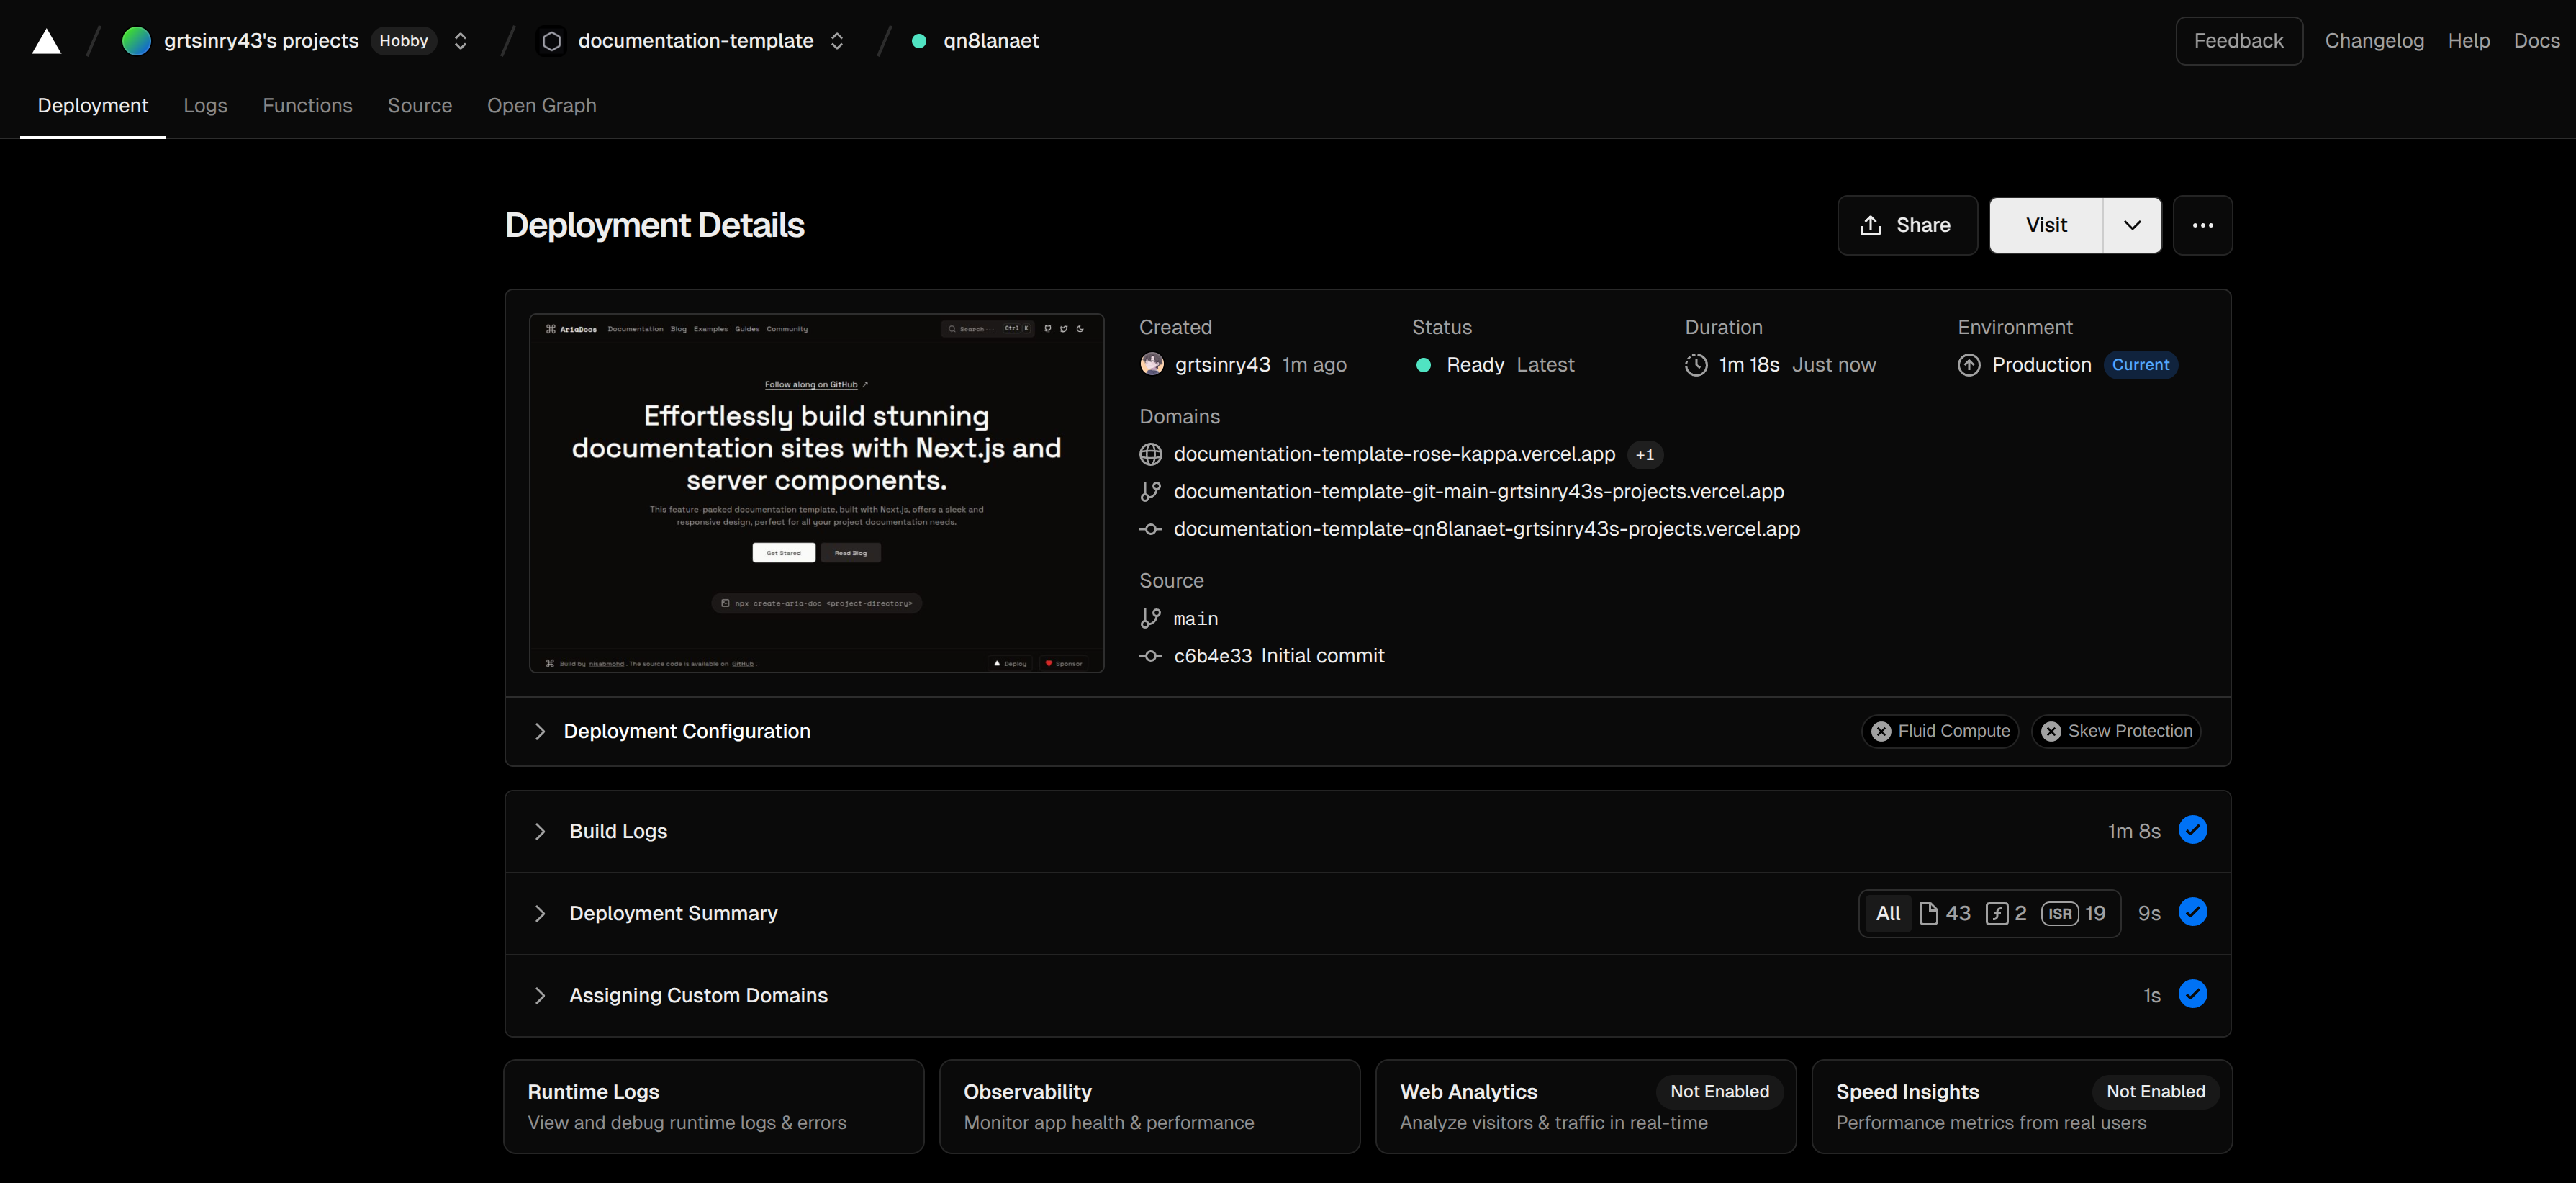
随后部署-> 找到失败的部署进行重试
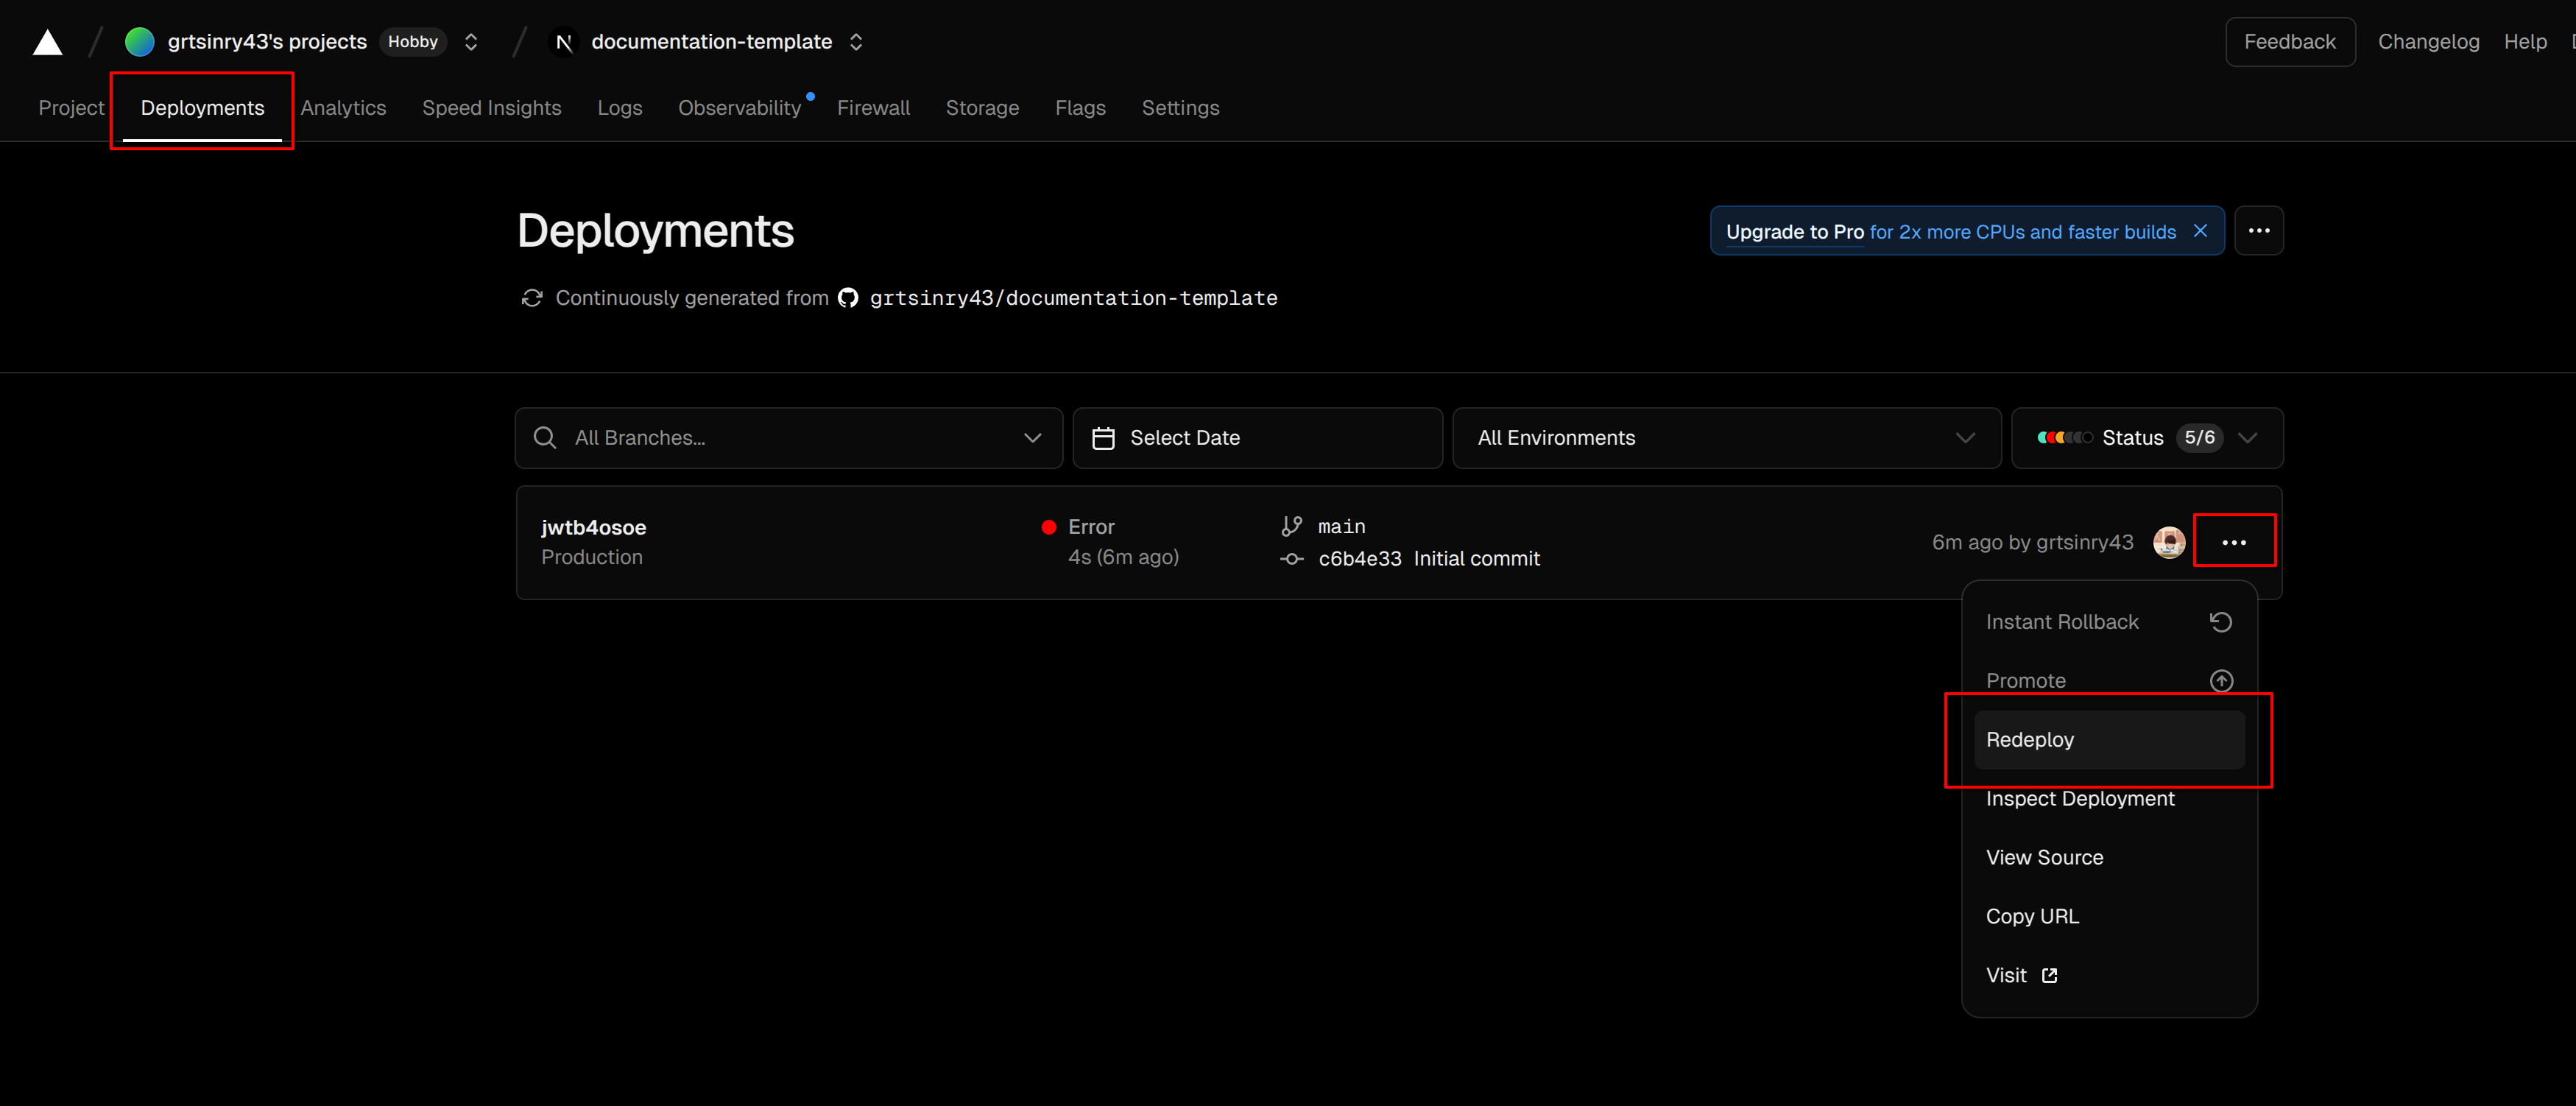
就这样,你的项目和网站创建好了,你可以通过上面的 Domains 来访问
优化样式和其他支持
你需要把项目克隆到本地,然后安装好对应的包,同样地 npm install -f
首页内容
你可以进入 app/page.tsx 来修改主页的内容,比如我的主页:
<div
className="flex sm:min-h-[85.5vh] min-h-[85vh] flex-col items-center justify-center text-center px-2 sm:py-8 py-12">
<Link
href="https://github.com/grtsinry43/learn-writing"
target="_blank"
className="mb-5 sm:text-lg flex items-center gap-2 underline underline-offset-4 sm:-mt-12"
>
在 GitHub 同步查看 {" "}
<MoveUpRightIcon className="w-4 h-4 font-extrabold"/>
</Link>
<h1 className="text-3xl font-bold mb-4 sm:text-6xl">
Grtsinry43‘s Learning Notes
</h1>
<p className="mb-8 sm:text-lg max-w-[800px] text-muted-foreground">
云笺漫录三更雨·竹牖轻收万壑风 /
Cloud-Paged Journals Whisper Midnight Rain, Bamboo Windows Gather Valley Winds in Veils
<br/>
记录了我在学习过程中的所思所想,以及一些技术分享。
</p>
<div className="flex flex-row items-center gap-5">
<Link
href={`/docs${page_routes[0].href}`}
className={buttonVariants({className: "px-6", size: "lg"})}
>
让我们开始吧
</Link>
<Link
href="/blog"
className={buttonVariants({
variant: "secondary",
className: "px-6",
size: "lg",
})}
>
看看文章捏
</Link>
</div>
<span
className="flex flex-row items-start sm:gap-2 gap-0.5 text-muted-foreground text-md mt-9 -mb-12 max-[800px]:mb-12 font-code sm:text-base text-sm font-medium border rounded-full p-2.5 px-5 bg-muted/55">
<TerminalSquareIcon className="w-5 h-5 sm:mr-1 mt-0.5"/>
{"git clone https://github.com/grtsinry43/learn-writing.git"}
</span>
</div>
导航栏的效果
默认的导航栏是没有模糊的,你可以手动修改一下,非常简单:
export function Navbar() {
    return (
        <nav className="w-full border-b h-16 sticky top-0 z-50 bg-background/70 backdrop-blur-xl">
            <div className="sm:container mx-auto w-[95vw] h-full flex items-center justify-between md:gap-2">
                <div className="flex items-center gap-5">
                    <SheetLeftbar/>
这里 bg-background/70 指的是背景不透明度,backdrop-blur-xl 代表背景模糊程度。
当然这里也可以随手改导航栏的项目。
公式支持
这里的 MDX 是默认不支持解析 LaTeX 公式块的,我们需要安装其对应的插件。
pnpm install remark-math rehype-katex
然后引入并添加到代码中:
// can be used for other pages like blogs, Guides etc
async function parseMdx<Frontmatter>(rawMdx: string) {
    return await compileMDX<Frontmatter>({
        source: rawMdx,
        options: {
            parseFrontmatter: true,
            mdxOptions: {
                rehypePlugins: [
                    preProcess,
                    rehypeCodeTitles,
                    rehypeKatex, // 这里
                    rehypePrism,
                    rehypeSlug,
                    rehypeAutolinkHeadings,
                    postProcess,
                ],
                remarkPlugins: [remarkMath, remarkGfm], // 这里
            },
        },
        components,
    });
}
其他的一些小玩意
比如文字选中的效果:
::selection {
    background-color: rgba(169, 169, 169, 0.3);
    text-shadow: 1px 1px 5px rgba(0, 0, 0, 0.2);
}
用法
使用的时候直接创建文档然后配置路由就好了,在 lib/route-config.ts
export const ROUTES: EachRoute[] = [
    {
        title: "Getting Started", // 这里是目录外显标题
        href: "/getting-started", // 路由
        noLink: true, // 根路由是否创建页面
        items: [
            {title: "Introduction", href: "/introduction", tag: "New"}, // tag 是一个小 Badge
        ],
    },
    {
        title: "React 的深入探索",
        href: "/dive-into-react",
        noLink: true,
        items: [
            {title: "Overview", href: "/overview"},
        ],
    },
    {
        title: "Taro 的尝试",
        href: "/start-with-taro",
        noLink: true,
        items: [
            {title: "Installation", href: "/installation"},
        ]
    },
    {
        title: "机器学习入门",
        href: "/machine-learning",
        noLink: true,
        items: [
            {title: "模型评估和选择", href: "/chapter-1"},
        ]
    },
    {
        title: "Vue.js 深入学习",
        href: "/dive-into-vuejs",
        noLink: true,
        items: [
            {title: "组件通信相关", href: "/part-1"},
            {title: "虚拟 DOM", href: "/part-2"},
            {title: "v-model 语法糖", href: "/part-3"},
            {title: "vue2 响应式原理", href: "/part-4"},
            {title: "diff 算法", href: "/part-5"},
        ]
    }
];
就…这样
大概就是这些了,它足够简单,没学过前端也能很快上手,写出来希望帮大家能弄一个这样知识库吧,毕竟真的是 流水不争先,争的是滔滔不绝,学习和记录还是很重要的。
对了,它也提供了博客功能,懒得弄可以考虑一下